Veggie-Cheese Stuffed Mushrooms….

There are a bazillion ways to do stuffed mushrooms. I think I’ve made em all. Yep, I have made a bazillion of them. I have so many favorites. My all time favorite is crab and cheese I think. Or maybe it’s the sun-dried tomato pesto. But it might be the bacon blue cheese. I mean, you could stuff anything in a mushroom and it would be good. I love mushrooms.

The ones here are veggie…….stuffed with more mushroom, bread crumbs, cheese, spinach, etc. I served them with a nice roast and it was the perfect pairing.

Here ya go:

mush1

mush2

Veggie-Cheese Stuffed Mushrooms

for 6  mushrooms

6 large mushrooms
1 clove of fresh garlic, minced
4 fresh spinach leaves
1/2 cup bread crumbs (I use Panko, since they are a bit crispy)
1 tblsp fresh minced shallot (green onion will work)
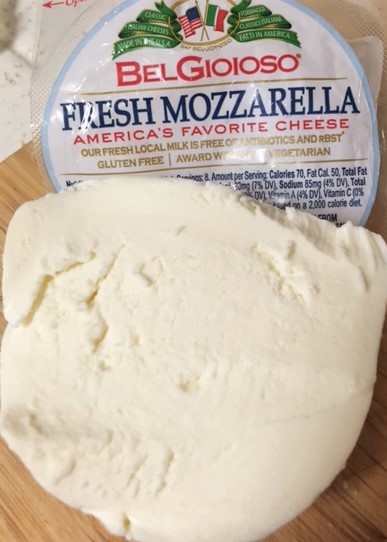
1/2 cup shredded mozzarella or Monterey Jack cheese
1/2 cup white wine (optional)

Wash and carefully remove stems from mushrooms. If your mushrooms aren’t big enough to hold much filling, gently scoop out some of the mushroom with a spoon.

Mince up the mushroom stems and the spinach leaves. In a skillet, melt 2 tablespoons of butter and add the minced stems, spinach, garlic, shallots, salt and pepper. Stir around for about a minute or so, until everything starts getting soft. Stir in the bread crumbs, until everything is well combined. Remove from heat and dump mixture into a bowl. Stir in most of the cheese, leaving a bit to sprinkle on top.

Fill the mushrooms. Sprinkle with cheese. Place in a buttered baking dish. I add about 1/2 cup of white wine, but it’s not necessary. Place in 350 degree oven for about 15-20 minutes.

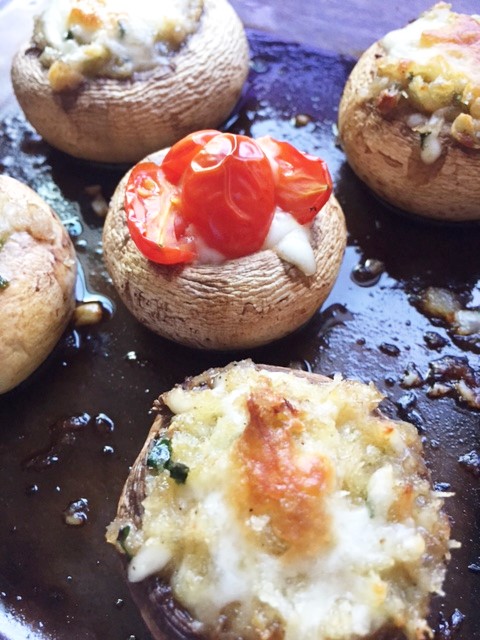
My picture above shows a mushroom with tomatoes. I just had a bit of leftover cheese that I stuffed into a mushroom and pressed a grape tomato into it…..very plain, but delicious.


Quick and Easy Oreo Cookie Truffles…….

Looking for a super quick treat?

I don’t know one person who doesn’t like Oreo cookies. Cookies and Cream ice cream, cookies and cream cupcakes, cookies and cream bark, cookies and cream cake pops……I’ve made them all.  Now, these are alot like cake pops, but they aren’t dipped in chocolate and they are not on sticks. Now, of course you could do that if you want to, but I wanted something a bit more creamy and something quick and simple.  I am calling these truffles.  These make a great gift. They’re simple, but rich and delicious. They are so pretty too. With the holidays approaching……EEK, can you believe it?…..these would be a great gift. You could dip some in chocolate, drizzle with white chocolate, roll them in cocoa, sprinkles or nuts. The possibilities are endless. This time, I just rolled the balls in crushed cookie crumbs. Then you could put them in a pretty little candy boxes or a nice tin, tied with some ribbon. Who wouldn’t be happy to get that!

These are super simple and quick. So, no excuses to all of you “non bakers”. There is no cooking or baking involved. You can get out all your frustrations by crushing the hell outta some cookies. You get to play with “dough” and they are so inexpensive to make!!!

I also made some chocolate red wine truffles that are DELICIOUS. I will be posting those later in the week.

oreotruffles1 oreotruffles2 oreotruffles3 oreotruffles4

 Easy Oreo Cookie Truffles

1  package of Oreo cookies (your favorite flavor) plus another  half package to crush for coating
6 ounces of cold cream cheese
Optional flavoring: 1 tsp coffee liquor, Chambord, rum, bourbon, etc.

Remove all of the white filling from the cookies of one of the packages. If you want the truffles sweeter, leave the filling in 3 or 4 cookies. Place the cookies in the food processor and blitz, blitz, crush, crush to a fine crumb. Add the cream cheese and flavoring. Blitz again until you have a smooth mixtures that all comes together. Form the mixture into 1″ balls.

NO FOOD PROCESSOR? Put the cookies into a large zip lock bag and crush them to smithereens with a rolling pin or something heavy. Dump the crumbs into a bowl and add the cream cheese and mix it all together with your hands. Form into 1″ balls.

Take half the cookies from the other package and remove the filling. Crush the cookies into crumbs. Roll your balls into the crumb mixture, gently pressing the balls into the crumbs. Place into little paper candy cups. Store in refrigerator. These are good served chilled or at room temp.

Makes approx. 45 truffles.


Orange Pull Apart…………….

Oozy, goozy, sticky sweetness. That’s what this treat is. Tender folds of orange doughy goodness, with a hint of cinnamon and vanilla. OHMERGAWWWD. Besides the fact that this is absolutely delicious, it’s fun to eat too. You pull apart the layers one by one, pop them into your mouth….ya say mm-m-m-mmmm and go for the next layer. Seriously this is good stuff. I’ve made this with lemon, orange, cinnamon-butter. All are good. But this orange is my favorite. It’s been awhile since I made this. I can’t believe I haven’t posted it until now.

I used my basic cinnamon roll dough. You can use the frozen Bridgeford bread dough, if you are not into making doughs. It works fine, but of course homemade dough is best. Use your favorite cinnamon roll dough recipe, or use mine. You can even make this in muffin tins. That’s fun too.

orangepullapart6  orangepullapart5

orangepullapart4 orangepullapart3

orangepullapart2 orangepullapart1

Orange Pull Apart Loaf

Dough:
1 cup whole milk
2 tablespoons of butter
3  1/2 cups flour
1/2 cup sugar
1 egg
1 envelope of rapid rise yeast
1 tsp salt

Filling:
1  tblsp. orange zest
1  tsp cinnamon
1/3 cup butter, softened
1  cup brown sugar

heat the milk and butter just until the butter melts. Should be just warm. NOT TOO HOT or you will kill your yeast. Killing is not nice. Pour into a standing mixer with a paddle attachment. Add 1 cup of the flour, sugar, yeast and salt. Beat on low for 3 minutes, scraping sides of your bowl. Add 2  1/2 cups of flour. Beat on low till flour is all incorporated and your dough is sticky. If it’s too sticky, add 1 tablespoon of flour at a time until the dough starts to form a ball and pulls away from the sides of the bowl. MAKE SURE DOUGH IS NOT TOO STIFF. Turn dough onto a floured surface. Knead it until it’s smooth and stretchy like for about 7 minutes. It’s a good workout! Whew! Form into a smooth ball. Lightly butter a bowl and plop your ball into it. Move it around so it’s coated with butter. Cover with plastic wrap and then put a clean towel over it. Let it double in size in a draft free place, about 2 hours. In the mean time, mix up your  filling.

Remove dough from bowl and place it on a floured surface. Roll out to about 12″ x 16″. Mix together the ingredients for the filling. Gently spread it all over your dough. Cut 4″ squares of dough. Lightly grease a loaf pan. If you don’t have a loaf pan, use a cake pan. If you use a cake pan, cut your dough squares 3″ x 3″. Place your squares of dough into the loaf pan, placing some with the corners up. (makes it prettier)  Don’t press them tightly together. Cover with a loose towel and let it set for about 30 minutes.

Preheat oven to 350 and bake loaf for about 25 minutes. I tend to under bake these since I like a bit of doughy-ness.

Allow to set about 20 minutes. Carefully remove from pan and drizzle with glaze (below)

Glaze:

1 cup powdered sugar
1 tblsp. orange zest
orange juice (just enough to get the consistency you like)

Mexi-Corn……

I love fresh corn in the summer. Don’t you? I like it steamed, boiled in butter, grilled, roasted, on the cob….off the cob. I love it. One of my favorite restaurants served a corn side dish recently, that I just couldn’t get enough of. So, of course I had to copy it. Mine was way better if I do say so myself. I think I’ve made it 3 times in the last 3 weeks. Even though I used fresh corn on the cob, this would work with frozen or canned corn as well. It’s light, fresh and filling. It was a great side dish to my baked chicken! I hope you will try it.

Sorry for the slightly blurry pics. I got a little excited. 🙂

mexi-corn2


mexi-corn1

Mexi-Corn

serves 4

4 ears of fresh corn on the cob (or 2 cans, or 1 frozen pkg)
1 fresh jalapeno, minced
2 green onions, sliced
1/4 – 1/2 cup minced bell pepper (I used an orange bell)
1/4 – 1/2  cup chopped fresh cilantro
2 cloves of fresh garlic, minced
salt and pepper to taste (heavy on the black pepper)
1/2 stick of butter (better with the whole stick)

Remove the corn from the cobs. In a large skillet, melt the butter. Add everything except the cilantro, into the pan. Stir it around until the corn is cooked to the consistency you like. It’s better when the corn is still crisp. Add the cilantro at the end, give it a stir, stir, stir.
That’s it! Easy.

Roasted Pepper and Mozzarella Bruschetta……….

The possibilities are endless when it comes to bruschetta. It’s a wonderful snack and great for serving to guests. My favorite is the basic marinated tomato and garlic mixture on top of a crunchy little toasted crostini slice. But I make so many kinds. Another favorite of mine is roasted red bell peppers and garlic, on top of fresh mozzarella cheese, on top of buttery, toasted bread. I used homemade bread today and it was so delicious. The red peppers are cooked slowly until they are caramelized and soft. When you put those peppers on top of the cheese, the cheese starts to get soft and melty. You hungry yet? Then you take that first bite……the crunch of the buttery, toasty bread…..the chewy, melty strings of cheese….and those slightly charred, sweet peppers and that bite of garlic. Holy crap! Doesn’t that sound good? If you want a little tang, drizzle a bit of good balsamic vinegar on top. I sprinkle a bit of crushed chili peppers on mine, since I love some spicy heat.

Oh, and I recommend a good hearty bread, sliced thin. Maybe a ciabatta or sourdough bread. Oh, and a nice glass of wine…like Pinot Grigio, or a crisp Chardonnay, or whatever your favorite is.

redpepperbrusch2 redpepperbrusch3

redpepperbrusch4  redpepperbrusch5

redpepperbrusch6  redpepperbrusch1

Roasted Red Pepper and Mozzarella Bruschetta

slices of a good hearty bread (you can buy the little appetizer pre sliced bread)
1 fresh red bell pepper, sliced thin
2 fresh cloves of garlic, minced
1 ball of mozzarella cheese (I prefer the softness of fresh mozzarella), sliced
Balsamic vinegar for drizzle (optional) or just use salt to taste

In a skillet, over medium heat, pour a couple of tablespoons of olive or vegetable oil. Dump in the sliced bell peppers. Slowly add 1/4 cup of water. (It will sizzle) Stir the peppers around and allow the water to evaporate. Continue tossing the peppers in the pan, until they are soft and getting a bit charred. Add the minced garlic and keep tossing so your garlic won’t burn. When the peppers are nice and soft, remove from heat. In another skillet, melt some butter, or you can use olive oil. Place bread slices in the butter or oil, top with cheese slices. Top cheese with peppers. Once bread is browned and crispy, remove from heat and onto serving plates. Drizzle with balsamic vinegar and serve.

If you are making these for a crowd, brush butter or olive oil over all your slices of bread and place on a large baking sheet. Place them in the oven at 425 deg. until browned and crunchy. Remove pan from oven, top bread slices with slices of the cheese and top with peppers. The heat from the peppers will slightly melt the cheese.