Peanut Butter Brownie Balls…….

Valentine’s is just around the corner. Wouldn’t you like to surprise someone with some homemade chocolate treats? Of course you would! Or, make them for yourself…..that’s even better. Who doesn’t like peanut butter and brownies!

These are so rich and creamy with a bit of crunch from the peanut coating. So sinful. If you don’t like peanuts, you could always use any of your favorite nuts. Hazelnuts would be great!

This is such a simple yet such a decadent treat. Another decadent and delicious candy coming up in the next few days, is red wine chocolate truffles, another great Valentine’s idea! You will love those!

peanutbutterbrownieballs1

peanutbutterbrownieballs2

peanutbutterbrownieballs3

Peanut Butter Brownie Balls

1 batch of your favorite baked brownies (boxed works great for this)
3 oz. of cream cheese
2 tblsp of peanut butter **
2 cups crushed/chopped peanuts**

Dump your completely cooled brownies in a mixing bowl or food processor. Add the cream cheese and peanut butter. Mix until everything is mixed well. If you want some little chunks of brownies in your brownie balls, reserve some of the baked brownies to mix in after you have creamed everything together.

Roll mixture into 1/2″-3/4″ balls. Roll the balls in the crushed peanuts, gently pressing into the nuts. Place them into some cute little candy wrappers……place them in nice little box and there you have a great little gift. Orrrrrr, forget the wrappers….and just plop em in your mouth!

** you could use almond butter and crushed almonds, or any of the nut butters and your favorite nuts. Or, forget the peanut butter and nuts altogether. Just increase cream cheese to 4 oz.


Easy 2 ingredient Biscuits…………….

I think I may have mentioned before that I am a biscuit fanatic. My dad made the best biscuits ever. He made down home country dishes and every Saturday morning, he would wake us up at 6:00 in the frickin morning to eat “chow”. That chow consisted of eggs, bacon or sausage, fried potatoes, the fluffiest homemade biscuits ever and gravy. Now, sometimes he would make the pop-out-of-a-can biscuits, but even those he would doctor up. We ate a lot of biscuits in our family.

Whenever I go out for breakfast, I always order a biscuit. Most times I am disappointed though. Usually what they serve are hockey pucks…a tough, over baked, choke your throat dough ball. BLEKH.

I can’t even begin to tell you how many biscuit recipes I have tried. I do have my favorite. I think I posted it awhile back. But recently I stumbled across a couple of recipes that intrigued me. One was a sour cream biscuit, which I tried and liked. The other was a 2 ingredient biscuit recipe. What????? Now, seriously…..I really hesitated in making this biscuit. But I was so curious. Flour and heavy whipping cream….hmmmm. Well, let me tell ya….these were some good biscuits.

The dough is a bit dry, so don’t be alarmed. It’s kind of a shaggy dry mess. Like my hair some days. 😦
The other thing is, with biscuits, they usually say “don’t over work the dough”. But this dough gets more handling than any other biscuit recipe I have ever tried.

I have to say, this is a darned good biscuit. I think my dad would have liked them. I hope you will to. Super easy and quick. It calls for self rising flour. In case you don’t know, that just means that the flour already has baking powder in it. If you don’t have self rising flour, don’t you worry. I will tell you how to make it your self. Easy! Actually, I rarely buy self rising flour, since it doesn’t seem to keep its self rising super power for very long.

Let’s bake a batch of biscuits…

2ingbiscuits3

2ingbiscuits2  2ingbiscuits 

Easy 2 ingredient Biscuits

2 cups Self Rising Flour (to make your own, see below **)
1 cup + 1 tblsp. heavy whipping cream

To make your own self rising flour: to 2 cups of all purpose flour, add 1 tablespoon of baking powder and 1/2 tsp salt. That’s it.

Heat oven to 425.
Mix the flour and heavy cream in a bowl. It will be dry. Dump it all onto your work surface and mix it all together with your hands until it comes together. Pat it out, fold it in half, pat it out, fold it in half, repeat 5 times. Then, with a rolling pin or your hands, pat it out to about 1/2 inch – 3/4 inch thickness. Use a round cutter or a glass and cut into circles. I made a half batch only, so I just patted the whole mound of dough out into a circle and cut it in half  and then in half again. See picture. Place biscuits on an ungreased baking sheet (sides touching) and bake for 10 – 12 minutes. They should be lightly browned.

Makes about 10 biscuits or 5 large. Bigger biscuits are better. Bigger biscuits with butter are better. Betty bakes bigger biscuits with butter. Betty’s butt will get bigger if she eats bigger biscuits with butter. Sorry, just couldn’t resist. hahahaha.

Hasselback Sweet Potato………………………….

What the heck is a hasselback potato, you ask? I have no clue how it got its name. I have been making these for years, but have always called them fanned potatoes. I do them with all kinds of potatoes. They just look so pretty. The slices are all open and fanned out and you can drizzle on some melted butter, cheese, brown sugar…..anything you want. It’s an impressive way of serving potatoes to guests.

I love sweet potatoes and yams. It’s a common breakfast for me. I just roast or microwave them, split em open and scoop em out with a spoon. I don’t put anything on them. I just love them that way! The only time I dress them up is at Thanksgiving. That’s when the brown sugar, butter, marshmallows get added. Ohhhhhh, yum.

Today I was craving a yam. It’s a cold, rainy day and having the oven on, with the aroma of the potato roasting was warming and comforting. Since I decided to do the fanned thing, I did add a wee bit of melted butter and sprinkled on some brown sugar.

Just a suggestion if  you make these with plain potatoes.  Sprinkle in some parmesan cheese and garlic in between the slices, once the potato has cooked for a while and starts to open up. It’s delicious. There are so many things you can do with these. Enjoy!

sweetpotato

sweetpotato2

sweetpotato3

Hasselback (fanned) Sweet Potato

Potatoes of your choice (sweet, russet, white, etc)
olive oil to brush on the potato

Wash your potatoes really well. Scrub, Scrub.
Place potato on cutting board. It’s best to lay a dish towel down so your potato wont slip when you are cutting it. Make slices 1/4″ apart. DON’T cut all the way through. I lay a wooden spoon down on each side of the potato, so that I can’t cut all the way through. The wooden spoon handle stops the knife blade from cutting all the way through. Cool, right?

Carefully lift the potato by both ends and place on an oiled baking sheet. I use cast iron, but you don’t have to. Carefully brush the potatoes with olive oil or veggie oil. Bake at 400 for 45 – 50 minutes, until potatoes are tender. During the last 10 minutes, here are some tasty options depending on what kind of potato you use:

– Drizzle melted butter in between the slices. Then sprinkle parmesan cheese and garlic.
– Drizzle with melted and sprinkle with brown sugar and/or cinnamon.
– Drizzle with honey and red pepper flakes.
– Place a thin slice of cheese in each opened slice. YUM!
– Place tiny marshmallow in the  slices.
– Drizzle melted butter and sprinkle bacon pieces in between the slices.

See there? There are so many things you can do.

Beef and Potato Supper………..

I have been making this dish for 40 years…..since I was just a wee baby. hahahaha. It’s such a perfect comfort meal. It’s hearty, filling and delicious. The weather has been cooler than we are used to here in San Diego and I love it!! This is the perfect dish for this wet, cooler weather. I came across this recipe in an old church cook book, that my mother had. Now, I know she didn’t get it at no church…..she must have been given this by a church going friend. hahahah……sorry. I believe the book was published back in the 50’s. It’s a great cookbook filled with old favorites. It gives me a chuckle because some of the ingredients called for are oleo, chopped bologna, potato flakes, powdered milk, etc. You just don’t see a lot of that these days.

Anyway, this recipe is actually called Connecticut Beef Supper. I have no clue why. When my daughter was little, she used to request connycut meat and tatoes. She loved this dish. It’s good stuff. Now, I used strips of beef, but it’s just as good with ground beef or ground turkey.   Try it both ways!

Rainy, cold weather….a hot beefy, cheesy potato, stick to your ribs, make you feel good dish. What could be better!

beefnpots1 beefnpots2 beefnpots3 beefnpots4 beefnpots5

Beef and Potato Supper (aka Connecticut Beef Supper)

2 lbs of beef (round steak, sirloin), cut into strips
1 large onion, sliced thin
4 medium-sized potatoes, sliced thin (I used Yukon gold potatoes, but russets work best)
1 cup sour cream
1 can cream of mushroom soup
1 cup shredded cheddar cheese
1/2 lb mushrooms, sliced thin (optional)

in a large skillet, add approx. 2 tblsp of oil. Add meat and onions and stir till browned and onions are tender. Add 1 cup of water and heat to boiling. reduce heat to simmer, cover and cook for 40 minutes.
Heat oven to 350. Pour meat and onion mixture (including liquid) into a 13×9 baking dish. Arrange potato slices on top of meat.

Stir together soup, sour cream, milk, salt and pepper. Pour the mixture over the potatoes. Cover with foil and bake for 1 hour or until potatoes are tender. Remove foil, top with cheese. Once cheese melts, remove from oven.

Note: you can par boil your potato slices ahead of time, if you don’t want to wait so long for baking.

Note 2: if you don’t eat meat, you can just leave it out. It will still be good.

Sooooooo good!

Feta Cheese Dip with Sundried Tomato Pesto…

Happy New Year Everyone!

I want to thank you all for following my blog and for your support over the years. I hope your holidays were wonderful and I hope you have a fantastic new year. I will continue to share some good recipes with you. I will also be adding some new things to my blog that I hope you will enjoy. If there is anything you would like to see, please email me or leave a comment and I will get back to you pronto!

Let’s start this new year with a simple little give away. I have an adorable apron to give to one of you. I will have another one next month as well. All you have to do is leave a comment to this post, telling me what was the best thing you ate over the holidays? If you have a problem leaving a comment, email me at sugarbundlebetty@outlook.com

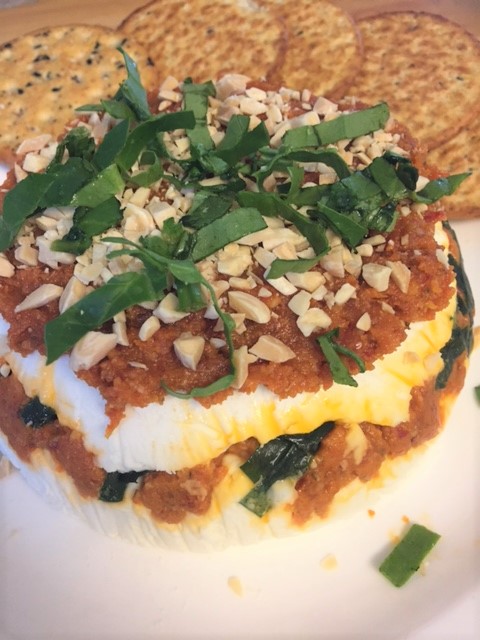
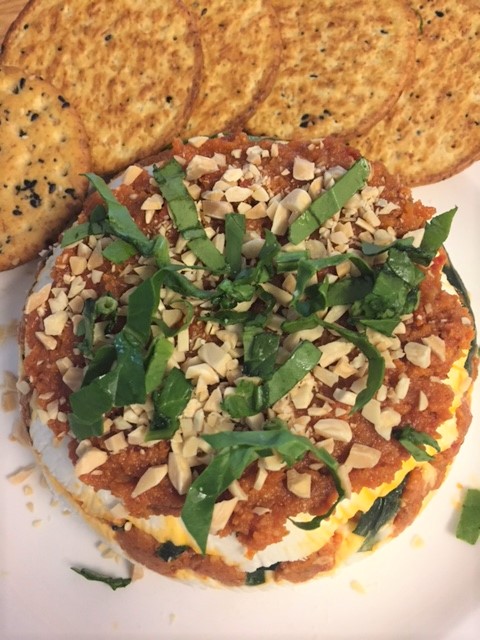
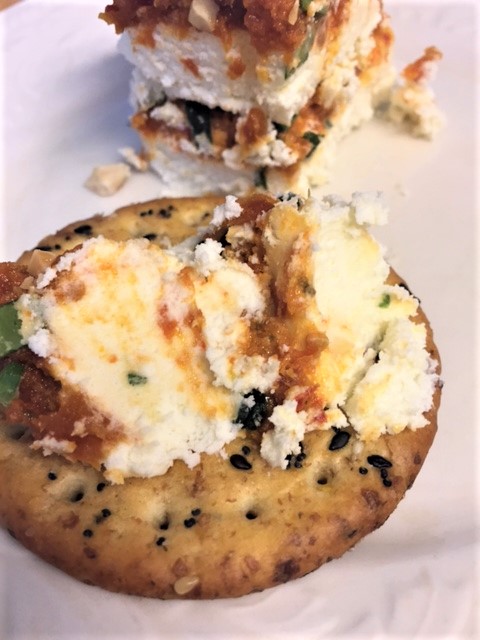
This is a recipe that I wish I had posted for ya’ll, before the holidays. It’s the perfect dip to serve guests. But you will want to make this for yourself! It’s a great Super Bowl snack and trust me….it will be devoured! It’s so delicious served with your favorite cracker or some good sourdough bread. It’s very rich and a little goes a long way, so you don’t want to pile it on your cracker. The combination of the feta dip along with the sundried tomato pesto…..M-mmm.

I first had this at a cookie exchange party several years ago. Thank you Debra, for the recipe. I’ve changed the recipe a bit, but this is really good stuff. I served it a couple of years ago at Thanksgiving. I had a guest who really isn’t into the actual Thanksgiving meal, so he made a meal of this. Remember that, Dean?  Well, this and chocolate chip cookies. Hahahah.

I made this dip into a layered mound. But you don’t have to. You can just put the feta mixture onto a plate and top it with the sundried tomato pesto. Be creative and do it any way that works for you.

feta1 feta2 feta3 feta4 feta5  feta6

feta7 feta8

Feta Dip with Sundried Tomato Pesto

Feta Dip:
8 oz block of cream cheese, softened
1/2 cup butter, softened
3 tblsp olive oil
2 cups feta cheese
2 tsp onion, minced finely
2 cloves of fresh garlic, minced finely
4 tblsp white wine, or vodka (you can use milk)

Mix everything together in a food processor, until creamy. Set aside.

Sundried Tomato Pesto:
1 cup sundried tomatoes
1/4 cup parmesan cheese, grated
1 – 2 tblsp olive oil, depending on how thick you like it

Mix tomatoes, cheese and olive oil in a food processor, until smooth.

Garnish:
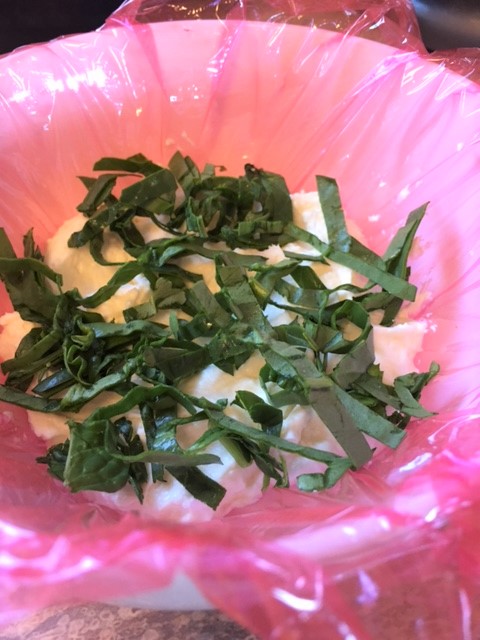
1 cup minced basil or spinach
1/2 cup pine nuts (or use your favorite nuts. I use almonds)

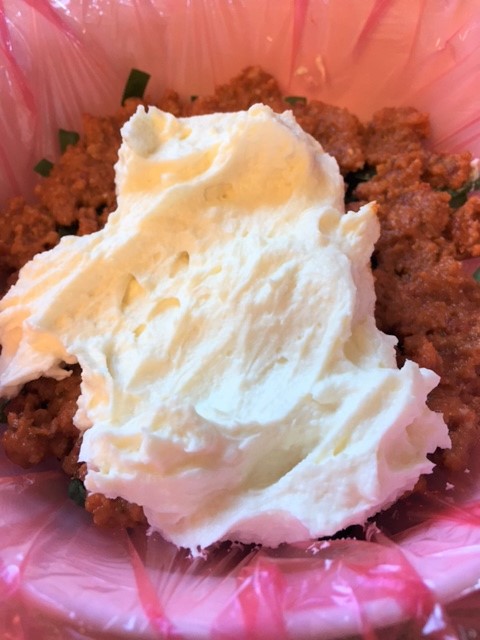
Line a bowl with plastic wrap, with the plastic wrap hanging over the sides of the bowl. Now, start the layering process in this order:

-half the feta cheese mixture (spread evenly in the plastic wrap lined bowl)
-sprinkle half of the basil or spinach on top of the cheese mixture and lightly press down
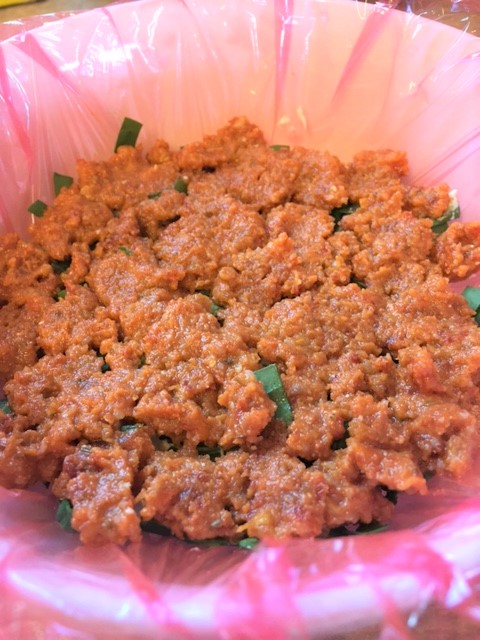
-carefully spread half the sundried tomato pesto on top of the basil
-spread the remaining cheese on top

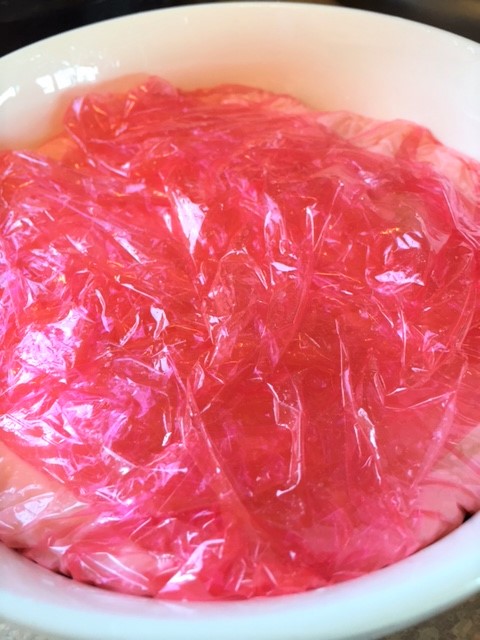
Bring the plastic wrap up and over the mixture. Gently pat it down to press everything together. Chill for at least an hour.

Remove from refrigerator. Grab the plastic wrap and lift it out of the bowl. Place serving platter on top of the dip and flip it over. Remove the plastic wrap carefully. Top the mound with the remaining pesto. Sprinkle on some nuts, gently pressing them into the pesto. Sprinkle with basil. Allow to sit for awhile before serving. It’s good chilled, but better at room temperature. Serve with some good crackers.

A nice glass of white wine or champagne goes oh so well with this. Enjoy.

Don’t forget to leave a comment for a chance to win the apron of the month.