Blackberry Cake….

I’m crazy about blackberries. I love to snack on them, smoosh them up and put them on ice cream and I love fresh blackberry margaritas.

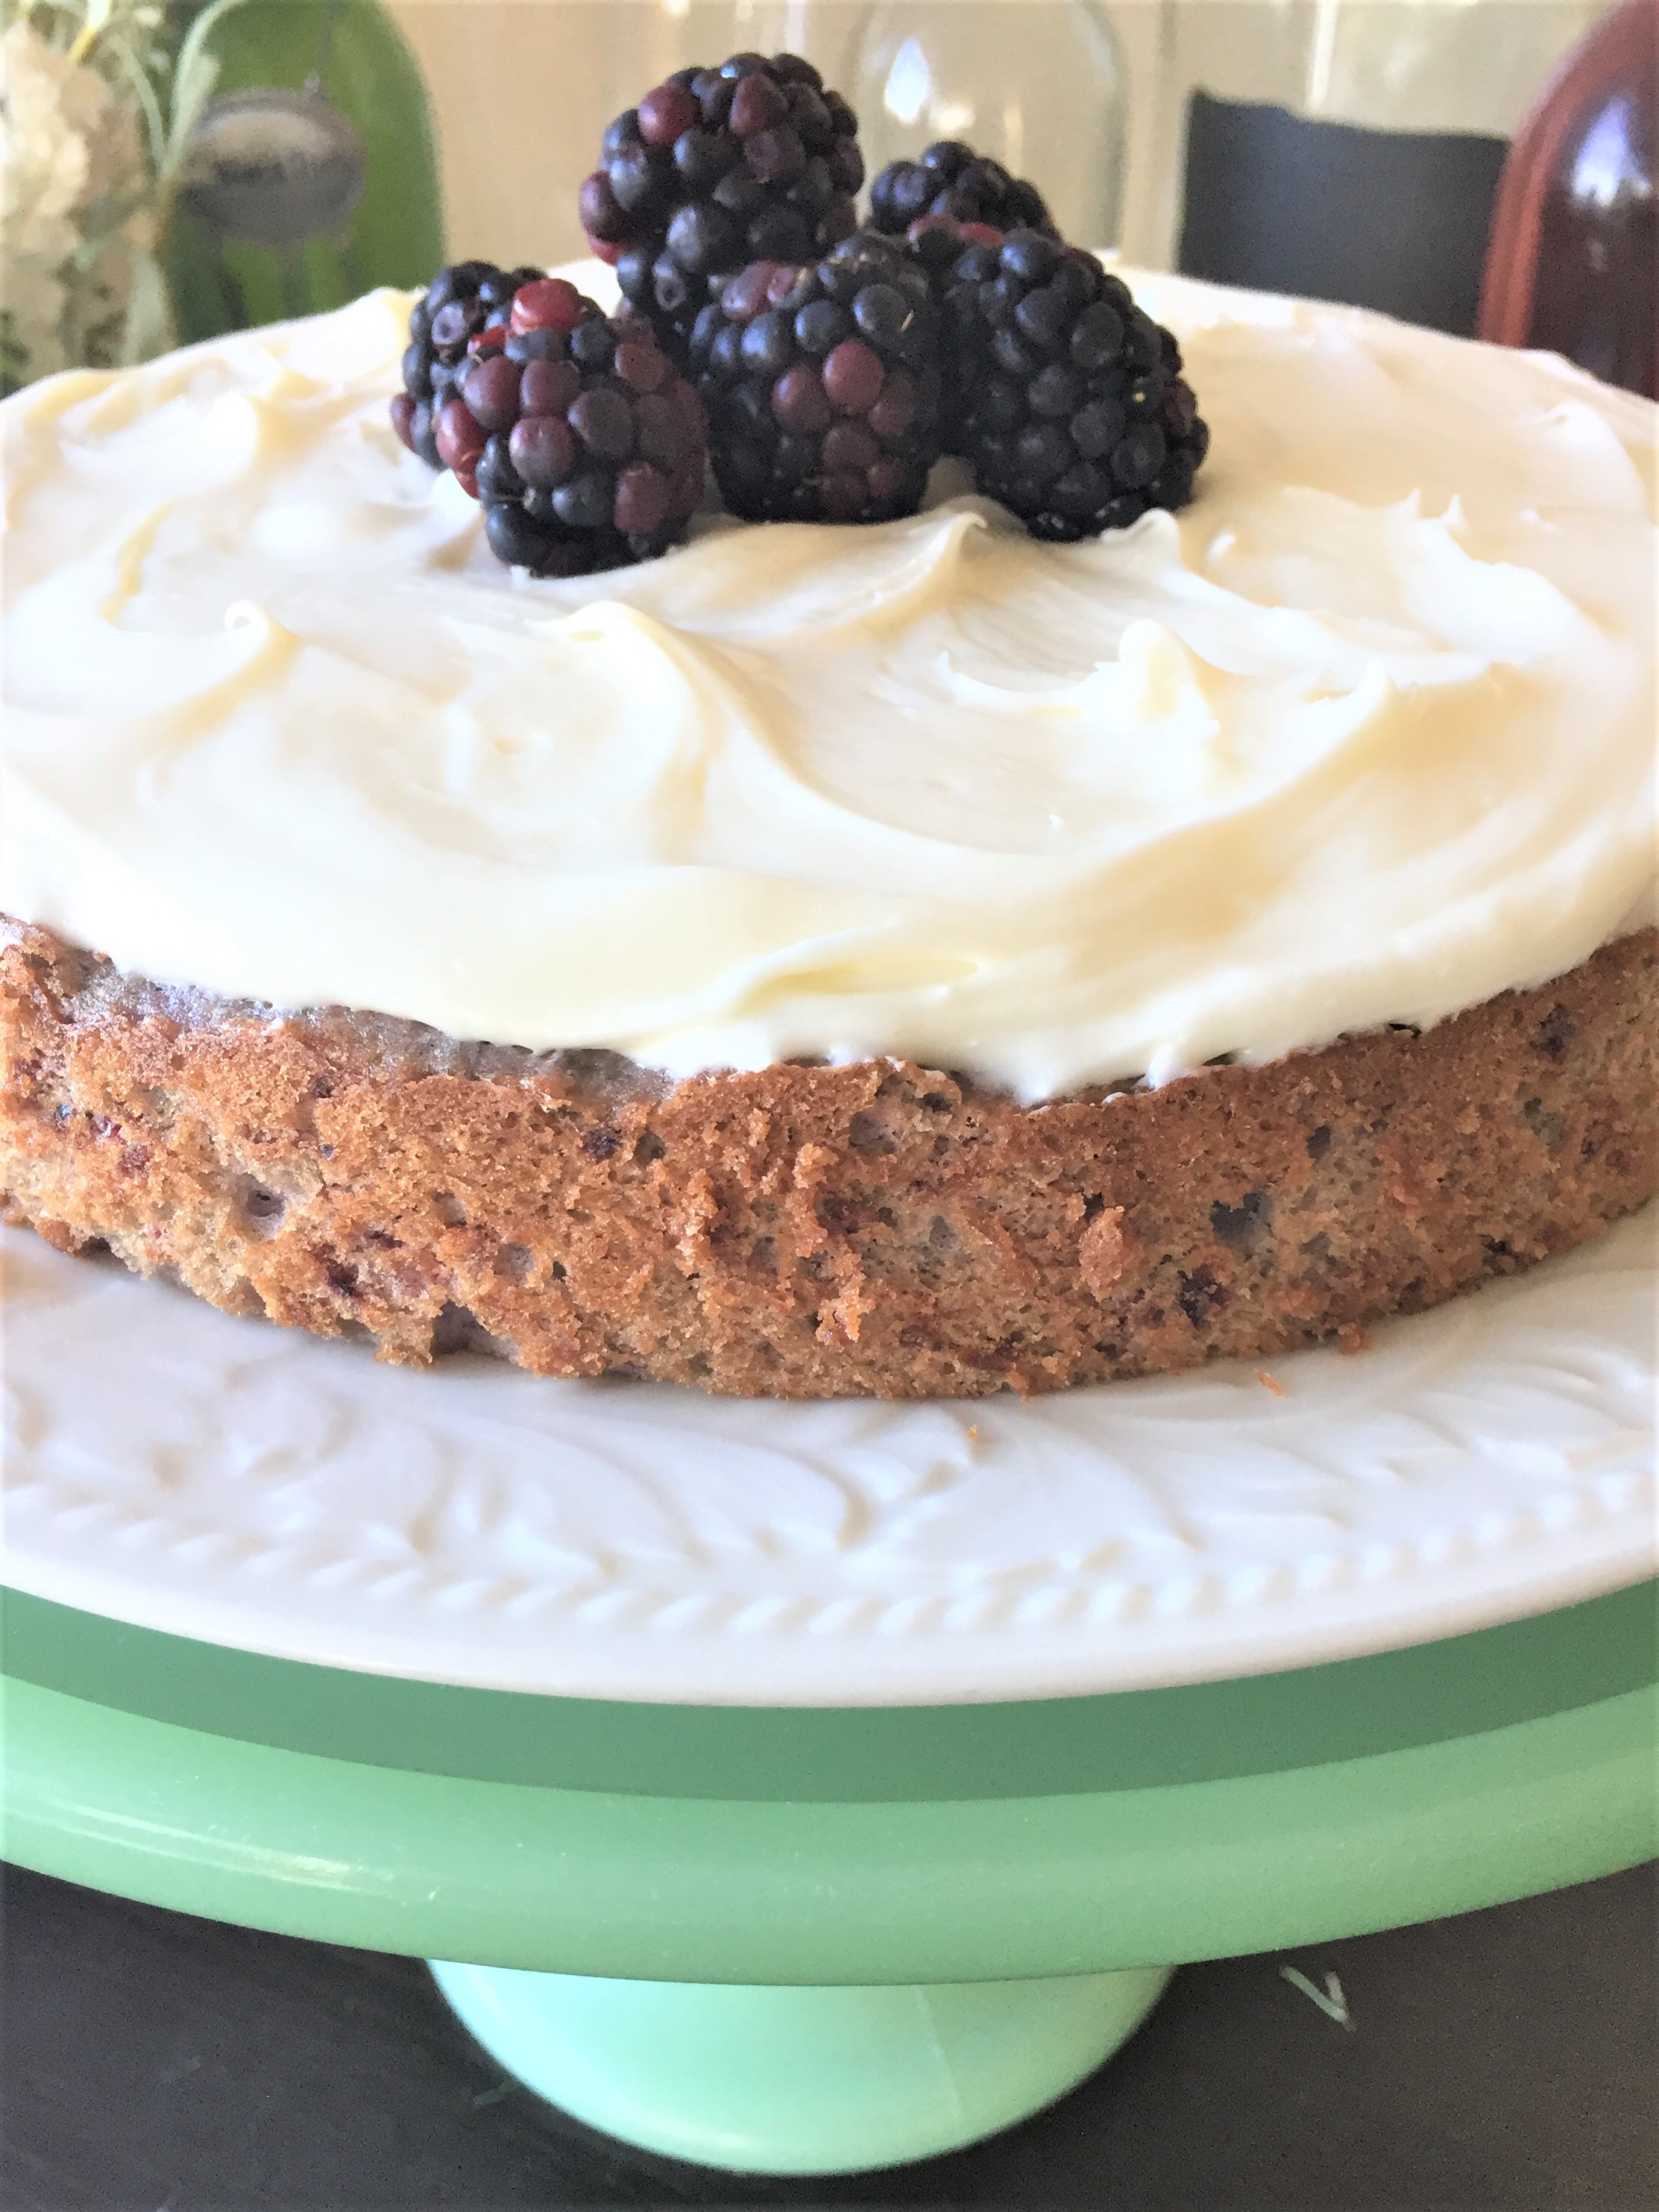
Last week I was looking at a recipe on line and noticed a picture off to the side, of a slice of  purple cake. I had to find out what it was! It was just so pretty. Well, it was blackberry cake with cream cheese frosting. OMG! The site was Serious Eats. I knew that I had to make this cake right away. Well, I did make a few adjustments and made it.

This is a single layer cake. It doesn’t rise much. It’s good. But I have to say, it was better the second day. It was much more blackberry-ish. It doesn’t have a real intense flavor, but it’s there.  I do recommend frosting this cake lightly. Cream cheese frosting is pretty heavy and rich and you won’t want to take away from the flavor of the cake. The frosting is not the star of this show.

I did puree some extra berries to pour on top of the cake . Wow, I’m so glad I did. Amazing. It looks so pretty too.


Blackberry Cake

1/2 cup butter, softened
3/4 cup sugar|
1  1/4 tsp. baking powder
1/8 tsp baking soda
2 egg whites
1 1/4 cup cake flour
1/8 tsp salt
1/2 tsp vanilla
1  1/4 cup fresh blackberries

Heat oven to 350. Spray an 8″  cake pan with a non stick cooking spray. Place a piece of parchment paper on the bottom of the pan. Spray that too.

Smash the berries into a puree. You should have about 3/4 cup of puree. I left mind a bit chunky.

In a large bowl of a stand mixer, at medium speed, mix together the butter, baking powder, baking soda, salt and sugar until fluffy. Add the egg whites one at a time. Reduce speed to low. Mix in half of the cake flour and then the blackberry puree. Mix in remaining cake flour, until you no longer see any flour specks. Pour into prepared pan.

Bake for 25 – 30 minutes. Check the cake for doneness at 25 minutes, by sticking a toothpick in the center. It should come out clean. Allow to cool for about 45 minutes. Run a knife around the edge of the pan to loosen the cake. Remove from pan, onto a plate. Allow to cool completely.  Frost. Top with berries or puree some berries to pour on top.

Frosting

4 oz of softened cream cheese
1/4 cup of softened butter
2 cups of powdered sugar

With a mixer, mix together the cream cheese and butter until creamy and smooth. Add the powdered sugar and mix well until creamy and smooth.

The only Pumpkin Bread I Like. Holiday Recipe #1

Well, here we are into October. Unbelievable. Can you believe the holidays are just around the corner? You know what that means! It’s time to get out the holiday recipes! Yay! I absolutely love holiday baking. So-oooo,  here is holiday recipe #1………Pumpkin Bread.

Every Christmas we’re all given those cute little pumpkin breads, all wrapped beautifully and tied with ribbon. While I so appreciate the thought….and I really do, I always compare it to my recipe. I just cant help it. There really isn’t a pumpkin bread out there that I have ever liked, except for mine. I’m sure you’re all saying to yourself, “how different can pumpkin bread be?!”  I know that everyone has their favorite recipe. There are so many variations. Once in a while I will buy a slice from Starbucks.  It’s ok, but it has a certain spice that I am just not fond of. Maybe nutmeg…..ewwwwww…..yuck.

Let me tell you the story behind my recipe. Many years ago a coworker brought me some of her pumpkin bread. I repeatedly told her that I didn’t like pumpkin bread. She insisted that I try it. I promised her that I would try it “later”. Ok, so the truth is, I discreetly dumped it in the kitchen trash. I know, I know……so bad right? Well, later she asked me how I liked it.  I said “ohhh, so is that a secret family recipe?” She said “yes, I will bring you the recipe and bake you a loaf”. Uh-oh.

So, the next day, there was a beautifully wrapped loaf of this beautiful pumpkin bread, tied with ribbon, sitting on my desk. Attached, was the recipe written on a sheet of steno pad paper. I still have that piece of paper….and you can tell that I have used that recipe many times. Anyway, I didn’t feel right about tossing that gift she made me, so I took it home and sliced it up. My back then hubby, kept eating it and eating it. I kept hearing “Mmm-m-m-m”. So I gave it a try. It was so darned good. I have been making it ever since. It’s not overly spiced and it’s extremely moist. There is just so much flavor.

I have friends who don’t care for pumpkin bread and I told them the story of how I came to like it, so they agreed to try it. Now they request a loaf every holiday season.

I happen to like raisins in some baked goods. I do use them in this bread. But if you are not a fan of raisins, just leave them out.


you can see how moist this bread is. It’s making my mouth water..


I usually don’t top the batter with pumpkin seeds, but it is a great combo, so…….

The Best Pumpkin Bread

1 cup brown sugar
1/2 cup sugar
1 cup canned pumpkin
1/2 cup vegetable oil
2 large eggs
2 cups all purpose flour
1 tsp baking soda
1/2 tsp of each: salt, cinnamon
1/4 tsp ginger
1 cup raisins – optional
1/2 cup walnuts, chopped
1/4 cup water

Heat oven to 350.

In a large mixing bowl, combine the sugars, eggs, oil and pumpkin. Beat until well blended. Mix in the flour, baking soda, salt and spices. Add water and mix well, but not too much. Stir in the raisins and nuts.

Pour into a well oiled loaf pan. Bake for 50 – 65 minutes, depending on your oven. Stick a skewer in the center and if it comes out clean, its done. Allow to cool for about 20 minutes and then remove from pan.

I like mine slightly warm with some butter. But it’s delicious just plain, as well. Perfect with a hot cup of tea.


Kimchee…………….

I remember there was a time when everyone wrinkled their nose when I would mention kimchee. Now, it’s so popular and I see it everywhere. Recently, I even noticed that a local burger joint had a kimchee topped burger on its menu.  This weekend on the Food channel, there was a bloody mary profiled, that had kimchee in it. YUM.

In case you don’t know what it is, it’s a Korean side dish made with lots of salt, cabbage and red pepper flakes that are finely ground. It also contains lots of garlic. Of course there are variations using cucumbers (my fave), onions, radish, etc. It becomes pickled/fermented by all of the salt. It’s served with almost every Korean meal……kinda like a little salad or garnish.

I love to add it to my ramen bowls, or fried rice. Kimchee fried rice is delicious too. Oh, and how about some teriyaki beef or chicken tacos with chopped kimchee as a garnish instead of the traditional lettuce. If you haven’t tried kimchee, I hope you will. It’s really good. I love it so much. I remember when I was growing up, my mom and I would stay up late watching a Japanese movie. She would fix us each a bowl of rice with hot green tea poured over it and some kimchee drizzled with soy sauce, on the side. It is to this day, still one of my favorite comfort foods.

Just a note…..might wanna have some mints close by. Hahahahah, you will definitely have garlic breath.


Kimchee

1 large (or 2 medium) bunch of Napa cabbage
6 -7 cloves of fresh garlic, grated or minced very fine
1/2 cup sea salt
5 green onions, sliced
1 Tblsp fresh grated ginger
4 cups water
3/4 cup Korean pepper powder (found in Asian markets)

Chop napa cabbage into large pieces. Place them in a large bowl. Sprinkle with the sea salt. Pour the water over the cabbage and give it a good toss. Let it sit like that for an hour and a half, tossing once in awhile.

In another bowl, mix together the pepper powder, ginger, garlic and green onions. Pour in 1 cup of water and mix everything together. Set aside.

After the cabbage has set for an hour and a half, drain the water off. Rinse the cabbage twice and drain well. Add the red pepper mixture and mix well. Dump it all into an airtight container or jar. Allow to set out on the counter for an entire day. The salt content will ferment your cabbage. After a day, place it in the refrigerator for at least a day, but I always wait 2-3 days. Give it a good shake and eat it up!

4 Berry Cobbler………………

What could be better than a hot berry cobbler with a side of creamy vanilla ice cream? Isn’t your mouth watering? Cobblers are good any time of the year, but it’s such a great holiday dish, don’t ya think? You may want to consider this one for the upcoming holidays. This particular cobbler is a real favorite of mine. I love berries. Sometimes when I make this, I throw in some dried cherries or even cranberries. The cranberries give it such a holiday taste.

I have made this with fresh berries and also with frozen berries. I gotta say….I don’t really see a big difference. So if fresh berries aren’t available, by all means use frozen!

The crust/topping on this cobbler is the same as the one on my peach cobbler  that I posted awhile back. If you haven’t tried the peach, you will definitely want to. The crust on this cobbler is amazing. It really is. It’s not one of those puffy, fluffy crusts….blekh, I don’t care for those. This one is just something you’ll have to try. It has a bit of a crackly, sugary, melt in your mouth topping. I will tell you this…I will never make any other cobbler crust. This is my one and only.

Don’t forget to serve it with some good vanilla ice cream!


4 Berry Cobbler

Filling
3 – 4 cups of berries (blueberries, blackberries, raspberries, strawberries) Frozen or fresh
1/3 cup sugar
2  tblsp butter
Put the berries in a square baking dish (9×9). Scatter bits of the 2 Tblsp. of butter on top of the fruit and sprinkle with the 1/3 cup of sugar. Set aside.

Topping/Crust
1/2 cup butter, softened
1  cup self rising flour
1  egg
1 cup sugar

Heat oven to 350.
Using a mixer, mix together the butter and sugar till creamy. Gently mix in the flour. Don’t over mix. Add the egg and mix just until smooth. Drop by little spoonfuls all over the fruit. Sprinkle with about 1 Tblsp. of sugar. Bake for 35-40 minutes or until top is golden. Allow to sit out for 15 minutes. Serve warm with vanilla ice cream.

Honey Oat Bread……………..

As I have said many times, I am a bread person. I’m crazy about breads. That isn’t necessarily a good thing. I wish I didn’t like bread so much. But, hey, it could be worse, right? But at least with this bread, I feel like I am eating at least a little bit healthy since it has oats!! oh, and honey too! Those two items make it a healthy bread, right? Ok, if you are afraid to make bread…afraid to work with yeast, don’t be. You can do this.  You will love this bread toasted with some butter and maybe some apricot jam or honey. It’s a soft and pillowy bread that’s so good just plain also. Seriously, you’ll want to eat the whole loaf. But don’t do that!  So, let’s get started.

honeyoatbread1 honeyoatbread2 honeyoatbread3 honeyoatbread4

Honey Oat Bread

3 cups all-purpose flour
1/4 cup oats
2  1/4 tsp rapid rise yeast
1  1/2 tsp salt
1 cup milk
1/4 cup water
2  tbsp butter
1/4 cup honey

In a bowl of a standing mixer, mix the flour, oats, yeast and salt together. In another little bowl, heat the milk just enough to melt the 2 tbsp butter. Stir the heated milk and butter and add the water and honey. Pour the mixture into the flour mixture, mixing with a dough hook, just until it comes together to form a dough. Knead the dough in the bowl, for about 10 minutes, until the dough is smooth. If it seems too sticky after about 5 minutes, add a couple of tablespoons of flour. NOT TOO MUCH. Dough should be smooth but not tacky. Put the dough in a lightly buttered bowl. Cover it with a towel or plastic wrap. Allow to rise until doubled, for about 1/2 hour to 1 hour.

When doubled, put the dough on a dry cutting board, lightly floured. Flatten the dough with your fingers, into a 9″ x 12″ rectangle. Tightly roll the dough into a loaf and put it in a loaf pan. Cover with a clean dish towel until doubled, about 1/2 hour to 1 hour. Preheat oven to 350. Carefully brush the top of the bread with 2 tblsp of warm honey. Sprinkle with some oats. Place loaf pan in the oven Bake for 40-45 minutes, until the top is golden brown. Cool before slicing.

Ohhhhhh, it’s gonna smell so good!!