Lemon Curd/Lemon Filling……..

You don’t really think of lemons in winter time. But I bought a bunch of lemons with something specific in mind. I brought them home and then stood there and looked at them, trying to remember what the hell I had planned on making with them! Have you ever done that? Hmmm, I seem to be getting more and more forgetful. UGHHHH. So, I thought, well, I guess I will make lemon curd. So I made my favorite lemon curd recipe and just as I was finishing up, I remembered why I bought the lemons!!!!!!!!!!!  GAHHHHHH. Yep, I had planned on making homemade Limoncello…..that wonderful Italian liquor made with vodka and lemons. So, stay tuned for that recipe in the VERY near future. But for now, we have creamy, tart, sweet lemon curd.

I use this stuff as a filling for tarts, as a topping on shortbread, spread on top of cheesecake, cake fillings, served with scones, mixed with vanilla ice cream,  etc. There are so many uses. Or, you can just eat it by the spoonfuls…not that I have ever done that. 🙂

I even have a little tip on mixing up this stuff, so that you don’t have to worry about getting scrambled egg in your mixture. Most recipes like this ask that you make your hot mixture and then add a bit of that hot mixture to your egg yolks and then mixing all of that back into the hot mixture. Doing it that way, I still always manage to get some bits of cooked egg in my fillings. Blah.  So I have my own way of doing it, as you will see in my recipe below.

So, pucker up and enjoy!

lemoncurd5 lemoncurd1 lemoncurd4

Lemon Curd/Filling

1  cup granulated sugar
2 tablespoons of flour
3 tablespoons of corn starch
1/4 tsp salt
3/4 cup water
3/4 cup lemon juice (approx. 6 lemons depending on how juicy they are)
4 egg yolks, beaten
2 tablespoons of lemon zest (approx. 2 lemons)
2 tablespoons of butter

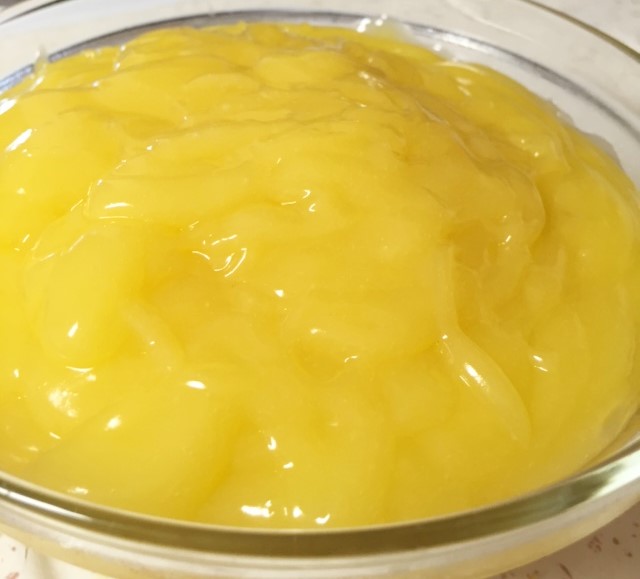
In a saucepan, whisk together the sugar flour, salt and corn starch. Add the 4 yolks to that mixture and whisk it all together until its all nice and smooth and creamy. Now add the lemon juice, water and lemon zest. Whisk it well and keep whisking over a medium heat, until thickened and satiny smooth. Cook for about 2 minutes, whisking constantly. Remove from and mix in the butter. If you should see any specks of cooked egg, just put the curd through a strainer. Allow to cool.
There you go! Now, do something with it. 🙂  I’m going to be baking some little tart shells and will fill them with this curd. Maybe tomorrow’s post!

Chewy Peanut Butter Toffee Chip Cookies…

Ohhhhhhhhhhh myyyyyyyyyyy. Ok, so if you don’t have a jar of peanut butter in your cupboard, go to the store now. Oh, and get some milk too. Trust me, you are going to want a cold glass of milk to go with your cookies. There are 4 cookies that I am always messin with. Chocolate Chip, Chocolate Fudge, Sugar Cookie and Peanut Butter. Oh wait! I can’t forget Snickerdoodle. Ok, so 5 cookies. I want the perfect recipe for each of those 5. I’m always experimenting and trying to come up with the perfect recipe……well, perfect to me anyway……my favorite. So, I have my favorite chocolate chip cookie, I may have my favorite chocolate fudge cookie, and I know for sure that I now have my favorite peanut butter cookie. I hope it will be yours too.

What inspired me for this cookie is the Peanut Butter Dream  cookie at Panera restaurant. Oh mannnnn, the first time I had one, I was obsessed with them! Then one day I went to buy one and I was told they were discontinued. It t’was a very sad day. So you understand now, my need to come up with something I liked as much. Hey, I take my cookies very seriously.

Ok, so these are chewy. They are crispy, peanut-buttery, rich and they have those wonderful crackly tops. I love cookies with crackles and craters on top. Ok, enough said. Go bake. I’m gonna go eat a cookie.

pbutter1 pbutter2

pbutter3

Chewy Peanut Butter Toffee Chip Cookies

1 egg
1/2 cup peanut butter
1/2 cup (1 stick) butter
1/2 cup sugar
1/2 cup brown sugar
1  1/2 tsp vanilla
1  1/4 cup all purpose flour
1  tsp baking soda
1/2 tsp salt
1/2 cup Heath Toffee bits (not the chocolate ones)
sugar for rolling

This recipe makes 8 big cookies….about a 5″ cookie. But you can make smaller ones. Just adjust your baking time if you make smaller ones.

In a big mixing bowl of a stand mixer, mix together the peanut butter, butter, the egg, brown and white sugar. Add vanilla and mix for a good 2 or 3 minutes. Mixture should be really creamy. Add the flour, baking soda and salt. Mix at low speed for about a minute and a half. Add toffee bits and give it a quick mix.

Use a cookie scoop (about 1/4 cup), and plop about 8 mounds onto a tray. Cover with plastic wrap and chill for at least 2 hours. Yes, you must chill the dough. You really must. It’s agony, I know. But you just gotta. In the mean time, line a baking sheet with parchment paper. Have a little bowl of sugar ready. Go read a book, watch tv…..then 2 hours later, preheat your oven to 350 deg. Take the cookies out of the refrigerator, roll the mounds in the sugar and place them 2″ apart onto your parchment lined baking sheet. Slightly press down on each cookie. Bake for 12 minutes. But check them at 10 minutes. You aren’t looking for really brown cookies. They may look a bit undercooked and that’s ok. Let the cookies cool on the baking sheet.

You know how some cookies are not that great on the 2nd day? These are just as delicious the 2nd day……if they last that long.

Yummy Miso Soup Makes Me-So happy…………………….


Sometimes, the most simple dishes are the most wonderful. I’m always surprised how many people tell me that they love miso soup. It seems to be pretty popular these days and is served at any Japanese restaurant. I grew up on the stuff and raised my daughter on it too. Miso is a soy bean paste……..very salty, a bit sweet, with an intense flavor of goodness. There is a white miso paste…which is a whiter, lighter color. Then there is red miso paste, which is a darker reddish brown color and its a bit more intense in flavor. I like both. A lot. You only need a little bit since it’s very intense. I must tell you, miso has a lot of sodium. 😦 It’s a good thing you only need a little bit. But it also has antioxidants and it is good for digestion. It’s made from soy beans, and we all know how good they are for us.

You can use this stuff to make the best salad dressing, in barbecue sauces, in marinades, etc. I love it smeared lightly all over a steak, chicken or a piece of fish and slap that piece of meat on the grill. OMG! Miso-like-it! haha, sorry…..I couldn’t resist saying that…me-so-like. hahahaha. Ok, ok, enough.

If you are familiar with Japanese food, you probably have heard of ONIGIRI. Onigiri’s are just rice balls…..yep, rice shaped in a semi ball shape and often filled with a little something. When I was a child, oh so many rice balls ago, my mom would make onigiris with a light layer of miso paste spread all over the rice ball. Simple but so yummy. It’s still a favorite of mine.

But with all that being said, this recipe is for the basic miso soup that I grew up on and still make today. I always add tofu and fresh spinach and then I ladle it over a bowl of rice. But traditionally, it is just the broth with a few bits of tofu and maybe some nori. Totally up to you. It’s a Japanese comfort dish for sure and it brings me much comfort every time I eat it. Aside from the salt, it really is healthy for you too…..especially with the tofu and spinach. But that isn’t why I eat it. Hahahaha, I just happen to love this stuff. I delivered some to my daughter yesterday for lunch and I think she was very happy. I think I may have heard her say “Miso-happy!” ok, well maybe she didn’t.

Trust me on this. You will like this. You can find miso paste at any Asian market and at most grocery stores too!

miso1  miso2

miso3        miso5

miso4  Miso Soup

3  tablespoons of miso paste
2  1/2 cups of water
fresh spinach (about 2 cups)
1  14-oz carton of tofu (there are many brands of tofu. I use soft or medium Japanese tofu, found in Asian markets and some grocery stores)
sliced green onion

Boil the water in a medium size pot. Turn heat down so water is just simmering. Add the miso paste and stirl until all miso paste is dissolved in the hot water. Give it a taste. If it isn’t salty or flavorful enough, just add a tsp or so, of miso paste. Add the spinach and tofu. Allow spinach to wilt.

Serve as is, garnished with a few sprinklings of green onion, or ladle over some cooked rice. Slurp, slurp.
You can also add some cooked ramen noodles!

Ideas for miso paste:

  • Add about a tablespoon to some salad dressing and drizzle on your salad or use as a chicken marinade
  • lightly rub chicken, beef or fish before grilling, baking or roasting
  • add a tsp to some melted butter and drizzle over some fish or veggies


Honey Oat Bread…………

Ohhhh, this cooler rainy weather sure puts me in the mood to bake bread. I know a lot of people who are so intimidated by bread making. But really….you mustn’t be skeered. Conquer your fear! Think of how fun it is to play with all that dough. Think of how good that hot, crusty bread is going to smell, baking in your oven. Think of that feeling of accomplishment, as you put your arms up in the air screaming “I baked bread!!!!!!!!” Feeling excited now? Ready to start? Yes!!!

This is one of my favorite bread recipes. It is delicious. It’s oatsy, slightly sweet and soooooo good toasted and slathered with butter. I just know you are going to love this.

honeyoatbread1 honeyoatbread2

honeyoatbread3 honeyoatbread4

Honey Oat Bread

3  cups all-purpose flour
3/4 cup oats
2 1/4 tsp rapid rise yeast
1  1/2 tsp salt
1  cup milk
1/4 cup water
2  tbsp butter
1/4  cup honey

In a large bowl of a standing mixer, combine the flour, oats, yeast and salt. In a small sauce pan, heat the milk and butter just until butter melts. Don’t boil it. Now stir in the water and honey. It should just be warm, not hot. Pour that milk and honey mixture into the mixing bowl with the flour mixture. Mix it together with a dough hook, just until it comes together as dough. Remove that dough off the hook and then continue to mix (knead), until the dough is smooth, about 8 minutes. At the end of that 8 minutes the dough still feels sticky, add 2 tbsp of flour and continue to knead until the dough just feels tacky, not sticky.

Place the dough into an oiled bowl, cover with a dish towel and allow to rise until doubled in size. This takes between 1/2 hour to 1 hour. Once doubled, place the dough onto a floured surface. Using your fingers, flatten the dough into a 9×11 rectangle. Roll the dough tightly into a loaf, tucking in the ends. Carefully place the dough into a lightly greased 9 x 5″ loaf pan. Cover with towel again and allow to rise again (doubled).

Preheat the oven to 350 degrees. Once the dough is doubled again, carefully brush the top with 2 tbsp of warm honey. Sprinkle with some oats. Bake bread for 40-45 minutes until the bread is nice and brown. Allow to cool before slicing.

Yay!!! You are now a baker of bread!!!

Happy New Year…….

I just want to wish all of you a very Happy New Year!!!!!! Thank you for visiting my blog and your support.

I hope this is a fantastic year for you. Be healthy, be happy and be kind.

Much love,

Sugar Bundle Betty

happynewyear