Key Lime Pie………

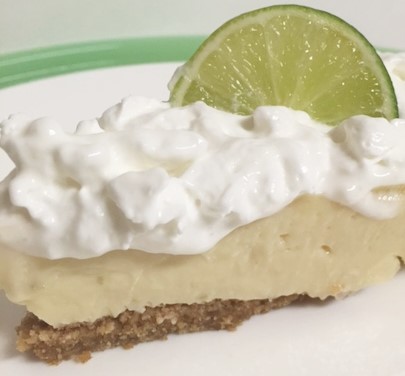
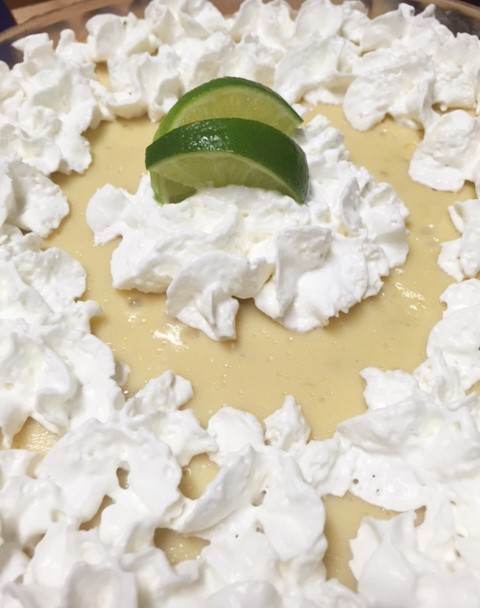
Pucker up! You are going to love this pie. It’s super easy and delicious.

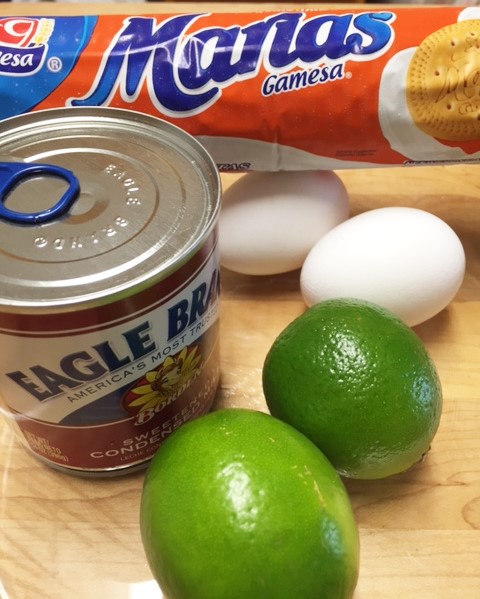
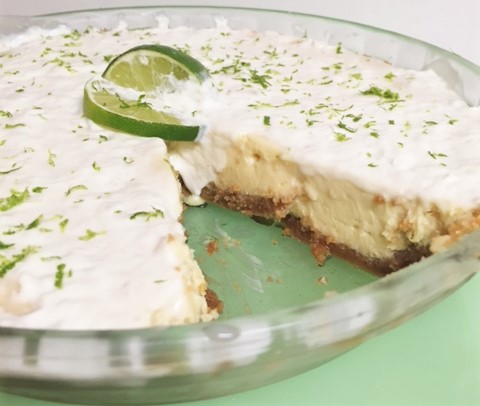
I think that limes are so under used. They are great for baking, in salad dressings, marinades and drinks. I love the smell of a fresh cut lime. It smells like summer time. It makes me think of my dad. He loved limes and every time he made himself a cocktail, he would squeeze a slice of lime in his drink. I loved that smell….still do. But it’s not just the smell, it’s the taste of lime. Yummm. So refreshing, tart and sweet. Especially in key lime pie. When I can’t find those cute little key limes, I will use regular limes and I have to be honest. I really cant’ tell the difference. Either way, this is a damn good pie. It’s sweet, creamy and tart. The sweetness makes it not too tart…..the tartness makes it not too sweet. Good balance, right? Yes! So, then you have the crust. I never use an ordinary graham cracker crust. Although, traditionally key lime pie is made with a graham cracker crust. I use a wafer cookie called Maria’s. It’s super crispy, not too sweet. They are super inexpensive and they make the best crust. If you can’t find them in the regular cookie aisle of your local grocery store, try looking in the Hispanic section.

Shall we make a pie?

keylime6 keylime7

keylime8 keylime3  keylime2 keylime4


keylime1

Key Lime Pie

crust:

3  tblsp butter, melted
3  tblsp sugar
1  package of Maria’s cookies, or approx. 16 whole graham crackers

Crush the cookies into fine crumbs. Add the sugar and melted butter. Mix until combined. Press into a pie plate. Bake for 8 minutes in a 350 deg. oven. Remove from oven and set aside.

Filling:

2  14oz cans of sweetened condensed milk
1  cup of fresh lime juice (approx. 6 regular limes, or 25-30 key limes)
2 whole eggs
2 egg yolks
zest of 2 limes

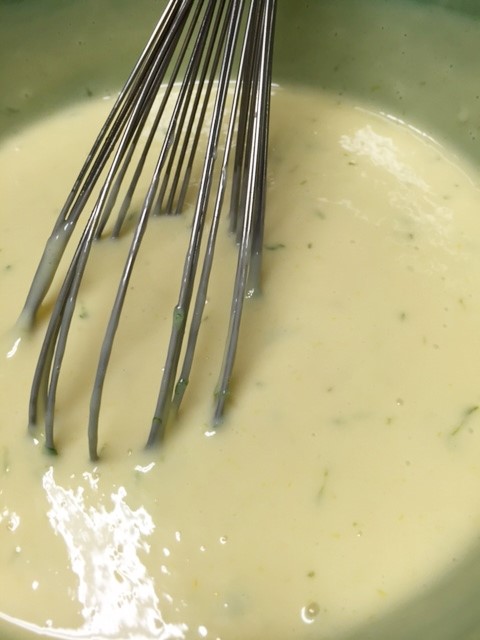
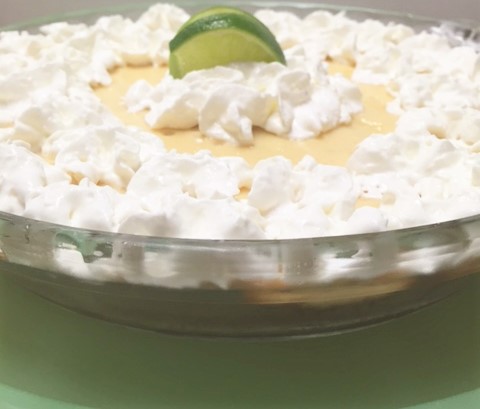
In a bowl, hand whisk together the condensed milk, lime juice, eggs, yolks and zest. Whisk until creamy. Pour filling into the pie crust. Bake for 30-35 minutes, until firm. Remove from oven and let cool. Place in refrigerator for at least 4 hours. Serve with some whipped cream.

Try not to eat the whole pie.


Chicken Taco Mac n Cheese….

Who doesn’t like macaroni and cheese? We all have our favorite mac n cheese. I have so many varieties that I make, but this is one of my favorites. It’s loaded with chicken….it’s super creamy, spicy and you just can’t stop eating it. It’s pretty easy to prepare too. I used spicy taco seasoning, but you can use mild if you’re not one to like beads of sweat to form on your forehead. Sometimes I throw in a can of chopped green chili peppers or some fresh minced jalapenos. As for the cheese, I find that Monterey jack cheese is a good melty cheese and that is what I have used many times.  But recently I discovered this “quesadilla” cheese, by Marcela Valladolid, from the Food TV show. I just LOVE this cheese. It’s sold in most grocery stores. It has a great melting quality and makes some great quesadillas. You just gotta try it.

So, let’s make some mac n cheese!

tacomacncheese1

The picture looks a bit bland, but who cares….It tastes good!

tacomacncheese2 tacomacncheese3 tacomacncheese4

Taco Mac n Cheese

2  cups elbow macaroni, cooked and drained
1  large chicken breast, sliced in bite sized pieces
2 tblsp taco seasoning (or more)
1/4 cup water
2 cups shredded cheese (Monterey Jack cheese is a good one. I used Mexican melty cheese and some sharp cheddar)
2 cups milk
3 tblsp butter
4 oz cream cheese
1/4 cup salsa

In a skillet, fry the sliced chicken breast in a small amount of oil. Don’t overcook. Stir in the taco seasoning and the 1/4 cup of water. Remove from heat. In a large buttered baking dish, add the chicken, cooked macaroni, salsa and shredded cheese. In a sauce pan, heat the milk and butter. Don’t boil it.  Add the cream cheese and stir until cream cheese is melted and mixture is smooth. Pour this sauce over the macaroni and chicken mixture. Mix all together. Cover with foil and bake for 20-30 minutes at 350 degrees.

Serves 4

optional: Top with cheese or crushed tortilla chips the last 10 minutes of baking.

Egg Chorizo Potato Stack…..

Yummmm, chorizo. Chorizo is so good. There’s  beef and pork chorizo, as well as soyrizo. I prefer the pork, but I have had the soyrizo and I must say, I couldn’t really tell it was soy. There are so many things to do with chorizo. But this is one of my favorites. I love the combination of chorizo and potatoes together, You add an egg to that and ohhhhhhhh my. It’s like a comfort food. You really don’t have to put it on a tortilla, but it just takes it to a whole new level, Sometimes, I drizzle a cheese sauce on top, or some sour cream. But usually I just drizzle some salsa on top and what a great breakfast…..or lunch…..or even dinner! I like my eggs runny so all that runny yolk oozing out everywhere is just so good. If you don’t like your eggs runny, you could use scrambled eggs. That is good also. It’s an impressive brunch dish that guests will love. Mm-m-m-mm, served with a mimosa…..oh YUM

eggchorizo1

eggchorizo2

eggchorizo3

Egg Chorizo Potato Stack

serves 2

half of a link of chorizo or soyrizo
2 corn tortillas fried flat and drained on paper towels
1 medium potato, cooked and cut into cubes
1/2 small onion, sliced thin
2 eggs, fried, poached or scrambled
salsa
optional toppings – sour cream, avocado, cheese

In a large skillet, cook the chorizo until done. Add in the cooked, cubed potatoes and the onion. Stir until onions are soft. Set aside. Cook the eggs to your preference.  Spread the chorizo mixture on top of the fried, crispy tortillas.  Carefully place an egg on top.  Add the toppings of your choice.


Garlic Ginger Teriyaki Tri-tip Roast…….

Now, I confess that I love beef way too much. I’m sorry all you haters of beef out there, but I just love beef. I try to eat more chicken but I just find it so boring. I do like fish though…..a lot! But it’s hard to find good, fresh fish. Some times, I even just have a veggie meal, believe it or not. Now, I don’t eat beef every day. I have really cut down!! Yes, I have limited myself to 5 times a week. Hahaha, just kidding. This tri trip is one of my favorite beef dishes. It is just so delicious. I mean, who doesn’t like soy sauce, ginger and garlic, right??  This is truly a MUST make. The leftovers are great too. It’s great for sandwiches, fried rice, quesadillas, served with ice cream….Ok, well, forget the ice cream. But, oh my gosh does it make a great sandwich. When I make sandwiches with this beef, I mix a little wasabi in some mayo. YUM!

tritip

tritip2 tritip3

tritip4


Leftovers, sliced for sandwiches, with cheese


Garlic Ginger Teriyaki Tri Tip Roast
serves 4-5

3 lb tri tip roast
olive or vegetable oil
3 tblsp finely minced garlic (the kind in the jar is fine)
3 tblsp finely minced ginger ( the kind in the jar is fine, as it is easier to spread around)
3-4 tblsp soy sauce

Heat oven to 400 degrees. Place the roast, fattiest side up, on a foil lined baking sheet. Rub oil over the entire roast.  Mix together the garlic and the ginger and pat it all over the top of the roast. Sprinkle the soy sauce on top of the garlic/ginger mixture. Roast it for approximately 45 minutes (for rare), or until internal temperature is 130 deg. Allow to rest for 10 minutes before slicing. Slice across the grain.