Fried Onion Dip…..

Tis the season for dip and chips and snacky things! So, you know that soup mix that comes in a little pouch, that comes in a box? The stuff that we have all used to make onion dip? Yeah, you know the stuff!  I don’t have it very often, but once in awhile, during the holidays, I do crave that onion dip. Problem is, it is so darned salty. Now, I am not a real salt fan and it’s a good thing too, since I have high blood pressure. That onion soup mix is full of sodium. Take a look at the box and see for yourself. Holy crap! Now, I know it’s easy to rip open a packet of soup mix and quickly make your dip, but why not try making your own? This is one good onion dip and it’s not loaded with salt. You have total control over that!

You will most likely want to dig into it right away, but if you can wait, the dip is much better the next day. So, put on the stretchy pants, turn on a good movie, settle into your favorite chair and dip away!!! But no double dipping….. 🙂
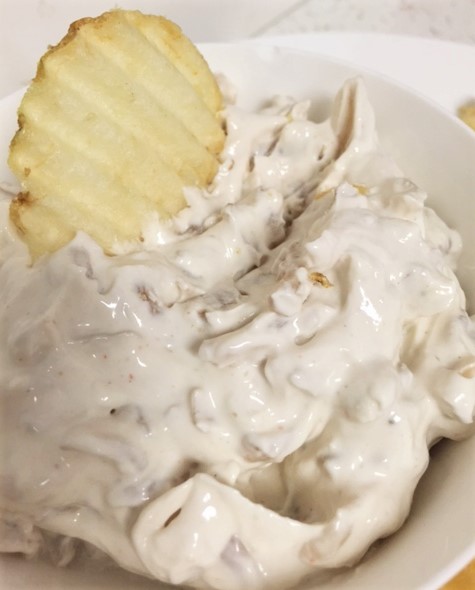
oniondip3     oniondip4

oniondip1  oniondip2

Fried Onion Dip

1 small to medium-sized onion, cut in super thin pieces
2 tablespoons of butter
2 cloves garlic
1 cup sour cream
4 oz softened cream cheese
1 tablespoon of fresh chives, minced (if you don’t have chives, add 1/4 tsp dried Thyme)
1/2 tsp Worcestershire sauce
1/2 of a beef, veggie or chicken bouillon cube
pinch of cayenne pepper

In a sauce pan, melt the butter. Add the onion pieces. Stir until the onions are softened to the consistency you like. Mix in the garlic.  Turn up the heat to allow the onions to get a bit charred. Watch carefully so they don’t burn.  Add the cream cheese into the pan, just to allow the cream cheese to soften. Set aside.
Into a bowl, mix together the sour cream, chives, Worcestershire sauce, bouillon cube and cayenne. Add the onion and cream cheese. Salt to taste. Cover and chill for several hours or overnight if you can wait.

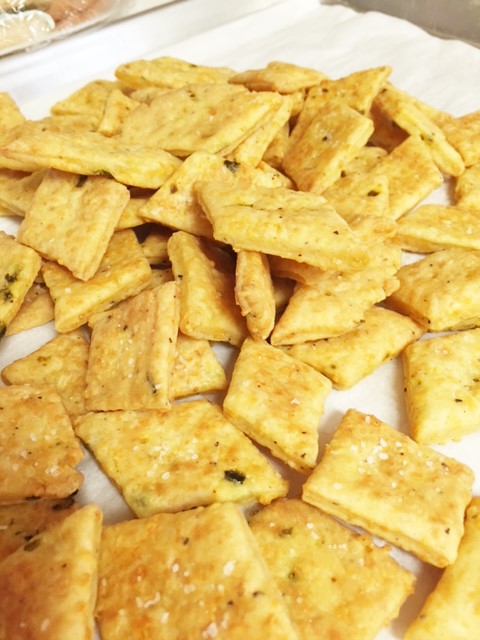
Serve with chips or crackers


Irish Cream with a twist………

I love the cooler weather that we have been having. We don’t get much of that here in southern California, so I am really enjoying this. After all, I am a cold weather kind of gal and what’s better than sipping a hot drink on a chilly day, right? I love having a cup of hot cocoa or a nice hot coffee or tea. But what I really enjoy is a hot cup of coffee with some Bailey’s Irish cream. Ohhhhhh, yum. I’ve been wanting to try making my own for some time now. But since all of the recipes call for Irish whiskey, I just haven’t made it. I’m not a whiskey gal. I can’t even stand the smell of it. Yes, I know Bailey’s has Irish whiskey in it and I do like it, but I don’t want to have to see or smell the actual whiskey. hahahah. So, I decided to experiment with vodka. Oh, what a fun experiment! Now, I just happened to have some vodka on hand. Hmmm, how did that bottle get in my cupboard anyway?

Ohhhh, yes, yes, yes…….wow. Yippy! So glad I decided to make this. Oh, this wonderful, creamy, delicious concoction. So, for you boozy people, you know how distinct the smell and taste of whiskey is, right? And you know how vodka really has no smell? Well, that’s what makes this even better! I mean, this stuff is a bit too easy to drink, so uhhh, you may want to be careful. You know, be responsible….blah blah blah. 🙂

Did I mention how easy this is to put together? It would make great gifts too, poured into some pretty decanters.

baileys4  baileys3

baileys2   baileys1

Vodka Irish Cream

1 pint (2 cups) heavy whipping cream
1 can sweetened condensed milk (12 oz can)
12 ounces of  vodka
2 tblsp  chocolate syrup (Ghirardelli, Hershey’s etc)
1 tsp vanilla extract
1 tblsp. espresso powder or instant coffee

In a blender, pour in everything but the vodka. Give it a couple of good pulses until everything is combined. Add the vodka. Give it a good blitz. Pour into a bottle and place in the refrigerator. Makes about 3 cups.

See there!! So Easy. Cheers! Really good stuff.

Serving suggestions: yes please. hahahah, sorry..see below.

  • Mix with coffee
  • Mix with hot cocoa
  • Spoon over ice cream
  • Dip a nice crunchy biscotti in a wee bit of this magic creamy stuff


Cookies and Cream Snowballs……..

If you are looking for an easy treat to make for the holidays, this is it.  Another treat that makes a great little gift, packaged in little cellophane bags, tied with festive ribbon. Or fill up a nice decorative tin!

There are quite a few different treats that I make for the holidays, but I gotta tell ya, these are always a favorite and always requested. People love cookies and cream….who doesn’t like Oreo cookies! I have even made these with the mint Oreo cookies and those are pretty darned good too. Not a baker? Well, then use a store bought cake or some plain donuts. Seriously, the donuts work great.

So, grab a box of cake mix….some Oreo cookies and lets play with snowballs.

cookiesncreampops1 cookiesncreapops2

cookiesncreampops3

Cookies and Cream Snowballs

1  premade cake from 1 box of white cake mix
powdered sugar for rolling
approx. 10 Oreo cookies
2 Tblsp of cream cheese

Bake the cake according to the cake mix directions. Allow to cool completely. In the meantime, remove the filling from 5 of the cookies and throw away that filling. Crush up the cookie parts and the other 5 whole cookies that have the filling. I use a food processor, but you can put the cookies in a zip lock bag and using a rolling pin, crush them up.

In a large bowl, break up the cake into crumbs. Add the crushed Oreos and the cream cheese. Mix it all up. You may want to use your hands to mix this. But make sure you use clean hands! You will want a consistency that you can roll into balls without crumbling. If your mixture is too dry, add a wee bit of cream cheese. Roll into 1″balls. Roll balls in powdered sugar and let sit. Snowballs will want to absorb the powdered sugar, so after about 20 minutes, roll in powdered sugar again. Package snowballs in bags, tin, boxes, etc. Sprinkle even more powdered sugar into containers, once packaged. That’s it! Easy right?

Makes about 50 snowballs.


Homemade Cheese Crackers…..

I love homemade crackers. They are delicious and addicting and oh boy do they go so well with wine! I mean, you don’t have to have them with wine, but they do go well together. You can make so many different kinds too. I made parmesan crackers awhile back and they were quite tasty. But the ones I made today are my favorites. These are cheddar/jack cheese with jalapenos. MM-m-m-mmm, puffy little crunchy bites of YUM.

They are so easy and quick to put together. They’re a great gift too! You could include a nice bag of these with a nice bottle of wine. Who wouldn’t want that as a gift?? You better make a lot though, they are addicting.

cheeseCrackers4                      cheeseCrackers5

cheeseCrackers3  cheeseCrackers2

cheeseCrackers1

Homemade Cheese Crackers

1  cup all purpose flour
4  tablespoons of  butter
1/4 tsp salt, garlic salt, onion salt
1/4 tsp black pepper (or cayenne pepper)
2 cups of shredded cheddar/jack cheese ( or just cheddar, pepper jack, white cheddar, parmesan etc. )
2  tablespoons of water
1  tablespoons of minced jalapeno (optional)

In a mixing bowl, using the paddle attachment, mix together the butter, cheese and spices. Gradually add the flour. Add the water and jalapeno. Mix until it all comes together.  Wrap in plastic wrap and chill for 45 minutes. Preheat oven to 375. Roll dough out on a floured surface. Roll as thin as you can get it…….like, really thin. Cut into the shapes that you want. I used a pizza cutter and cut into strips and then across again. Triangles work too. Place shapes onto a parchment lined baking sheet. Use a fork and poke holes in each piece. Bake for 18 minutes. Don’t let them get overly browned. Remove from oven and allow to set out till cool. Don’t try to taste them right away. They will not seem crispy and they will have a flour taste. Allow them to completely cool. If at that time they still don’t seem crispy enough, put them back in the oven for another 3-4 minutes.

Store in an air tight container, a nice tin, or in cellophane bags tied with some ribbon.


Chocolate Christmas Cookies………..

It’s that time again. Wow, can it really be the holidays already? I started my Christmas cookie painting. Usually I do vanilla sugar cookies but I have been in the mood to do chocolate this year. This is a really good chocolate cookie. It tastes a bit like a brownie….chewy….not too sweet. They are sturdy, they dont spread while baking and it’s a great cookie for decorating but you really don’t even have to paint them. You can just dust them with powdered sugar and they are delicious. I decorated this batch with white royal icing. But you can use any kind of frosting you want….even a spreadable buttercream frosting.

Ok, gotta go. More cookies to bake and paint!!

chocoChristmas1 chocoChristmas2

chocoChristmas3 chocoChristmas4 chocoChristmas5

chocoChristmas6


Chocolate Roll out Sugar Cookies

1  1/2 cups all purpose flour
3/4 cup unsweetened cocoa
1  1/4 tsp baking powder
1/4 tsp instant coffee (optional)
1  1/4 cup sugar
pinch of salt
3/4 cup butter, softened
1 egg

Stir together the flour, salt, baking powder and cocoa. Set aside. In a mixing bowl, mix together the butter and sugar until creamy. Beat in the egg. Gradually add in the flour at a low speed. Don’t over mix. Wrap dough in plastic wrap and chill for at least 3 hours. Heat oven to 350. Remove dough from refrigerator and roll out into a 1/4″ thickness, making sure to lightly flour your cutting board and rolling pin. Cut into desired shapes. Place pieces on an ungreased cookie sheet, 1″ apart and bake for 8 minutes. Allow cookies to cool for 5-7 minutes on the cookie sheet. Wait for cookies to completely cool before decorating.

Note: This is a very dark color cookie. They don’t spread while baking. They are a sturdy, chewy cookie.