No Fuss Ciabatta Sandwich Rolls…………………..

Ok, let me start by saying Don’t be intimidated by bread baking……especially this one. So easy. Please try it. People get so afraid of yeast and kneading the dough. This uses just a wee bit of yeast and there is NO KNEADING. Yep, you heard right. No kneading. See, there?

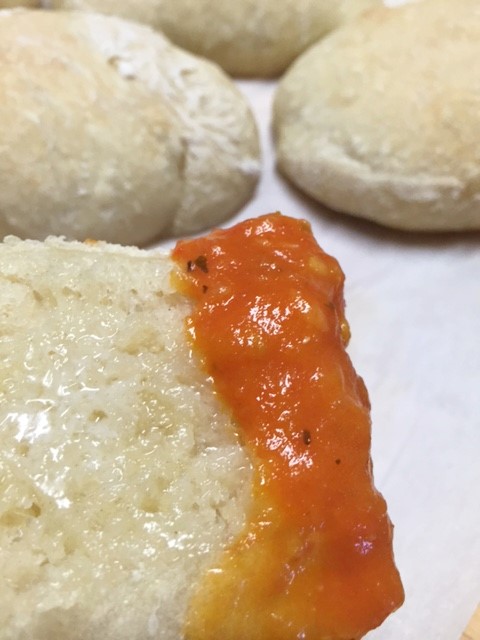
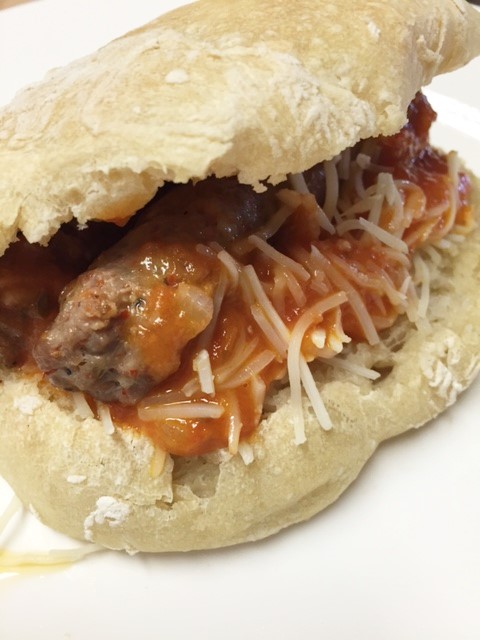
I love bread. I wish I didn’t. But it’s just so good. Rolls, bread, biscuits….I like them all. Big sigh. But my all time favorite bread is a good ciabatta bread. It’s a nice chewy, full of little nooks and crannies, Italian bread. It’s so good for a sandwich, as it really holds up nicely. Ohhh, and toasted with butter??? Yes please, so good. Or just dipped in olive oil and balsamic vinegar…..ohhhhhh, so good! Let’s make bread.

ciabattarolls1        ciabattarolls2

ciabattarolls3 ciabattarolls4

ciabattarolls5 ciabattarolls6

No Fuss Ciabatta Rolls

3  cups of bread flour
1  1/2 tsp salt
1/4 tsp rapid rise yeast  (yes, only 1/4  tsp)
12 oz room temp water

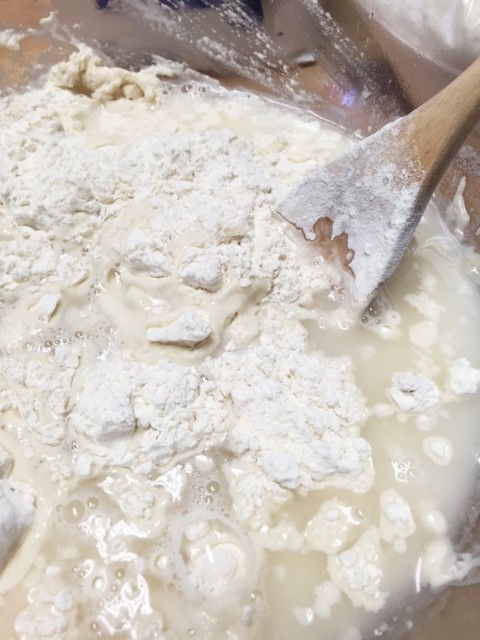
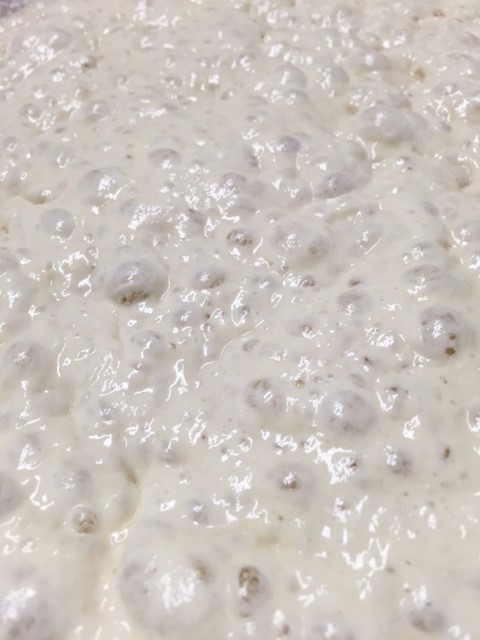
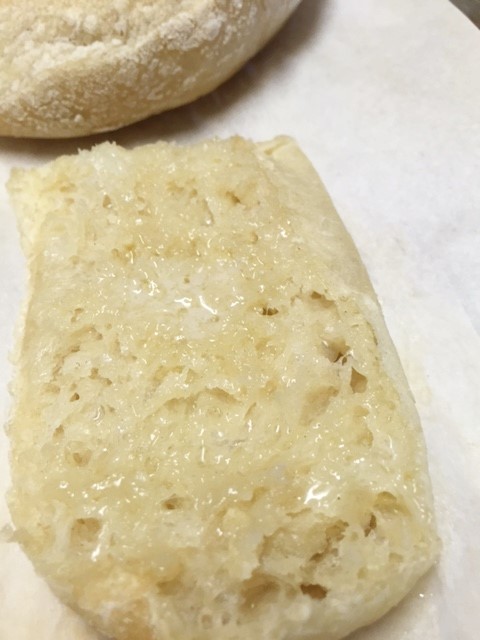
In a large bowl, whisk together the flour, salt and yeast. Add the water and stir until it all comes together. Cover with plastic wrap and let it just rest for 8 hours, on your counter.*  Dump it out onto a floured surface. Pat it down with your hands and fold it over. Then fold it over again. Give it another pat down. Cut it into 6 equal sized  pieces. Shape into rolls and place on a baking sheet. Cover with a clean dish towel and let rise another 1 hr. While it’s rising, preheat your oven to 450. Bake for 15 minutes. Allow to rest a few minutes.

* You can do the 8 hour rest in the refrigerator over night, if you want. But be sure your dough is in a large bowl.

Note: you can just shape this into a single loaf if you don’t want to do rolls. Just add 4-5 minutes to your baking time.

Muffin Tops and A Giveaway…….

So, I have a fun little give away today. But first, let’s talk about muffin tops.
How do you enjoy your muffins? Do you cut it up? Do you eat the top off first and then eat the rest of it? Or do you do like I do and just eat the top off and toss the rest? The top is the best part. Did you know that they have muffin top baking pans? Each cup of the muffin pan is only about a half inch deep. Cool, right?  Muffin tops are fun to make….coffee cake muffin tops, blueberry, or raspberry, like the ones I just made. You can even make big ol chocolate chip cookies, or brownies!

raspberrymuffintops1  raspberrymuffintop2

raspberrymuffintop3    raspberrymuffintop4

Raspberry Muffin Tops

3/4 stick of butter, melted
1/3 cup of milk
1 egg and 1 egg yolk
1 tsp vanilla
1  1/2 cup AP flour
1  1/2 tsp baking powder
1/4 tsp salt
1 to 2 cups of fresh raspberries or a mixture of blueberries and raspberry  (I use 2. I like a lot of berries)

Glaze: 1 cup of powdered sugar and a few drops of water or milk, whisked together. Add enough liquid to get your desired consistency.

Heat oven to 375. Grease your muffin pan with butter or spray. In a bowl, mix the room temp melted butter, eggs, milk and vanilla. Add flour, baking powder and salt and hand stir just till moistened. Gently add the berries. Scoop into your greased muffin pan. Gently spread almost to the edges. Bake for approx. 18 minutes. Test with toothpick for doneness. Allow to cool. Remove from pan, drizzle with glaze.

Now for the giveaway:

I am not a “big time” blogger YET, so I can’t give away mixers, or trips to Tahiti, but I am going to start having fun little giveaways from time to time. So, here is your chance to win your very own muffin top pan, plus a few extra tools to help you make your favorite muffins. You gotta have a big scooper thingy. You need a good wooden spoon, and how about some adorable measuring spoons?

giveawaymuffintop

All you have to do is comment to this post….just tell me what your all time favorite muffin is. One of you will be chosen at random. Please respond by Sunday, August 16th, 12:00PM.


Just the Best Roast Chicken…………

Everyone has their favorite way to roast a chicken. Some insist that slow roasting is the key, while others say a higher heat is best. I have done it both ways. I like both. I even like a crock pot chicken, even though I don’t get that crispy skin. Yes, yes…..the skin isn’t good for us anyway, but I love it! I think I could actually just eat all the crispy skin and throw away the chicken meat! Jes kiddin….kinda sorta.

So whenever I roast a chicken, I remove the back bone and open the chicken out flat. It cooks more even and quicker too. Try this method, if you haven’t done so. I think you will like it. So, this is my favorite roasted chicken recipe. It has lots of lemon, garlic, scallions and thyme. I love thyme…..and please try to use fresh thyme. It really does make a difference. This chicken is so flavorful and moist. Don’t be alarmed that the lemon and scallions char. Once the chicken is done, just remove those charred bits. You will be left with great flavor.

roastchick7 roastchick6

roastchick4   roastchick2 roastchick1 See how juicy! mm-m-m-mm

The Best Roast Chicken

5 pound chicken
1 lemon, sliced thinly
1 scallion, sliced thinly
3-4 sprigs of fresh thyme, little leaves removed or left on stems
1 clove fresh garlic, sliced
olive oil
1/4 cup melted butter
salt and pepper

Heat oven to 425.
Wash your chicken thoroughly and place on cutting board, breast side down. Use kitchen shears and cut along both sides of the back bone. Toss the back bone. Flip the chicken over, breast side up. Using your weight, press down on the breast so the chicken lies flat. Line a roasting dish or baking sheet with foil. Place the garlic slices on the foil and place the chicken on top of the garlic, breast side up. Rub the entire chicken with olive oil. Place the scallion slices, thyme and lemon all over the chicken.**  Sprinkle with salt and pepper. Place in preheated oven. Roast for half an hour. Carefully spoon melted butter butter all over the chicken. Continue to cook for half an hour. Remove from oven. Remove charred lemon slices and any charred scallion. Allow chicken to sit for about 10 minutes, before carving it up.

**Note:  If you don’t like seeing the little charred bits, you can place the lemon and scallion slices underneath the skin of the chicken instead of on top. But be careful not to tear the skin. Personally, I like seeing all those little charred bits.

Peach Cobbler to Die for………………

Peaches have to be my most favorite fruit. I love a fresh juicy peach. I love taking that first bite and having that juice run down your arm. I love peach ice cream, peach tea, peach popsicles, peach schnapps, peachitinis……..anything peach! Unfortunately, here at my local grocery stores, the peaches have been crappy. You can take a big ol bite and you sure won’t have any juice running down your arm! Big sigh. So, I went to a fruit stand not too far from me. Darn it all….it happens to be down the street from a casino. Dam. Should’ve just stuck with the peaches. But that’s another story.

I was quite pleased with the peaches I got, and knew I just had to make a cobbler. Now, I am not a huge fan of cooked fruit. But for some reason,  I was craving peach cobbler. This recipe works great with canned or frozen peaches too, if you can’t find good fresh peaches. The crust is what makes this cobbler special. It’s not that mushy, soft doughy stuff. This has a sugary crunch. It’s like a magic crust. You will love, love, love.

I have a friend who loves peach cobbler. Hi Miguel. I used to make it for him using a different recipe. I can’t wait for him to try this one. Miguel, I have it all packed up for you.

peachcobbler1 peachcobbler2 peachcobbler3 peachcobbler4

Peachy Peach Cobbler

Heat oven to 350.

Filling

3 cups of sliced peaches (I used 4 medium size fresh peaches) I leave the skins on.
1/3 cup sugar
2  tblsp butter

Put the peach slices in a square baking dish (9×9). Scatter bits of the 2 tblsp. of butter on top of the peaches and sprinkle with the sugar. Set aside.

Topping/Crust

1/2 cup butter, softened
1  cup self rising flour
1  egg
1 cup sugar

With a mixer, mix together the butter and sugar till creamy. Gently mix in the flour. Don’t over mix. Add the egg and mix just until smooth. Drop by little spoonfuls all over the peaches. Sprinkle with about 1 tblsp. of sugar. Bake for 35-40 minutes or until top is golden. Allow to sit out for 15 minutes. Serve warm with vanilla ice cream.

I’m telling you…..the Crust is incredible.


Smashed….Not Mashed……

You ever get the urge to just smash something?? Well, you can take out any frustration you may have, when you make these potatoes. Yep, and they taste soooooo good too. You get the flaky potato texture, plus some buttery, salty crisp, as well. How good does that sound?! They also look so much prettier on your plate, than a plain ol baked potato.

I usually use small white potatoes, but red potatoes are good too. They are a bit more flakey so they tend to crumble part, as you can see in my photos. But not to worry, just scoop up the little pieces and put them on top of the potatoes. You can use olive oil, vegetable oil, butter or a combination of those. I use both butter and olive oil. These smashers are good as a side dish to chicken, beef or as a breakfast, with eggs. Sometimes I just eat these by themselves.

smashpotato1 smashpotato2

smashpotato3 smashpotato4

smashpotato5

Smashers (Smashed Potatoes)

Quantities are going to depend on how many potatoes you are cooking:

small to medium sized potatoes, scrubbed and cleaned. (approx. 2 per person)
garlic powder, salt and pepper
thyme, rosemary, chives (whatever you like)
1/4 cup olive oil mixed with 1/4 cup melted butter

optional toppings/seasonings: crumbled bacon, blue cheese crumbles, parmesan cheese, chorizo….the possibilities are endless!

Heat oven to 450. In a large pot of water, boil the WHOLE, cleaned potatoes until fork tender, but not too soft. Drain potatoes. Lightly coat the bottom of a baking sheet with a bit of olive oil. Dump drained potatoes on the baking sheet.  Place Potatoes about 3″ apart. Using your palm, or a potato masher, carefully smash down each potato, until they burst open.  Using a pastry brush, dab each potato with the olive oil/butter mixture. Sprinkle with seasonings and herbs and bake for 15-20 minutes, until browned and crisp. Serve immediately.