4 Berry Cobbler………………

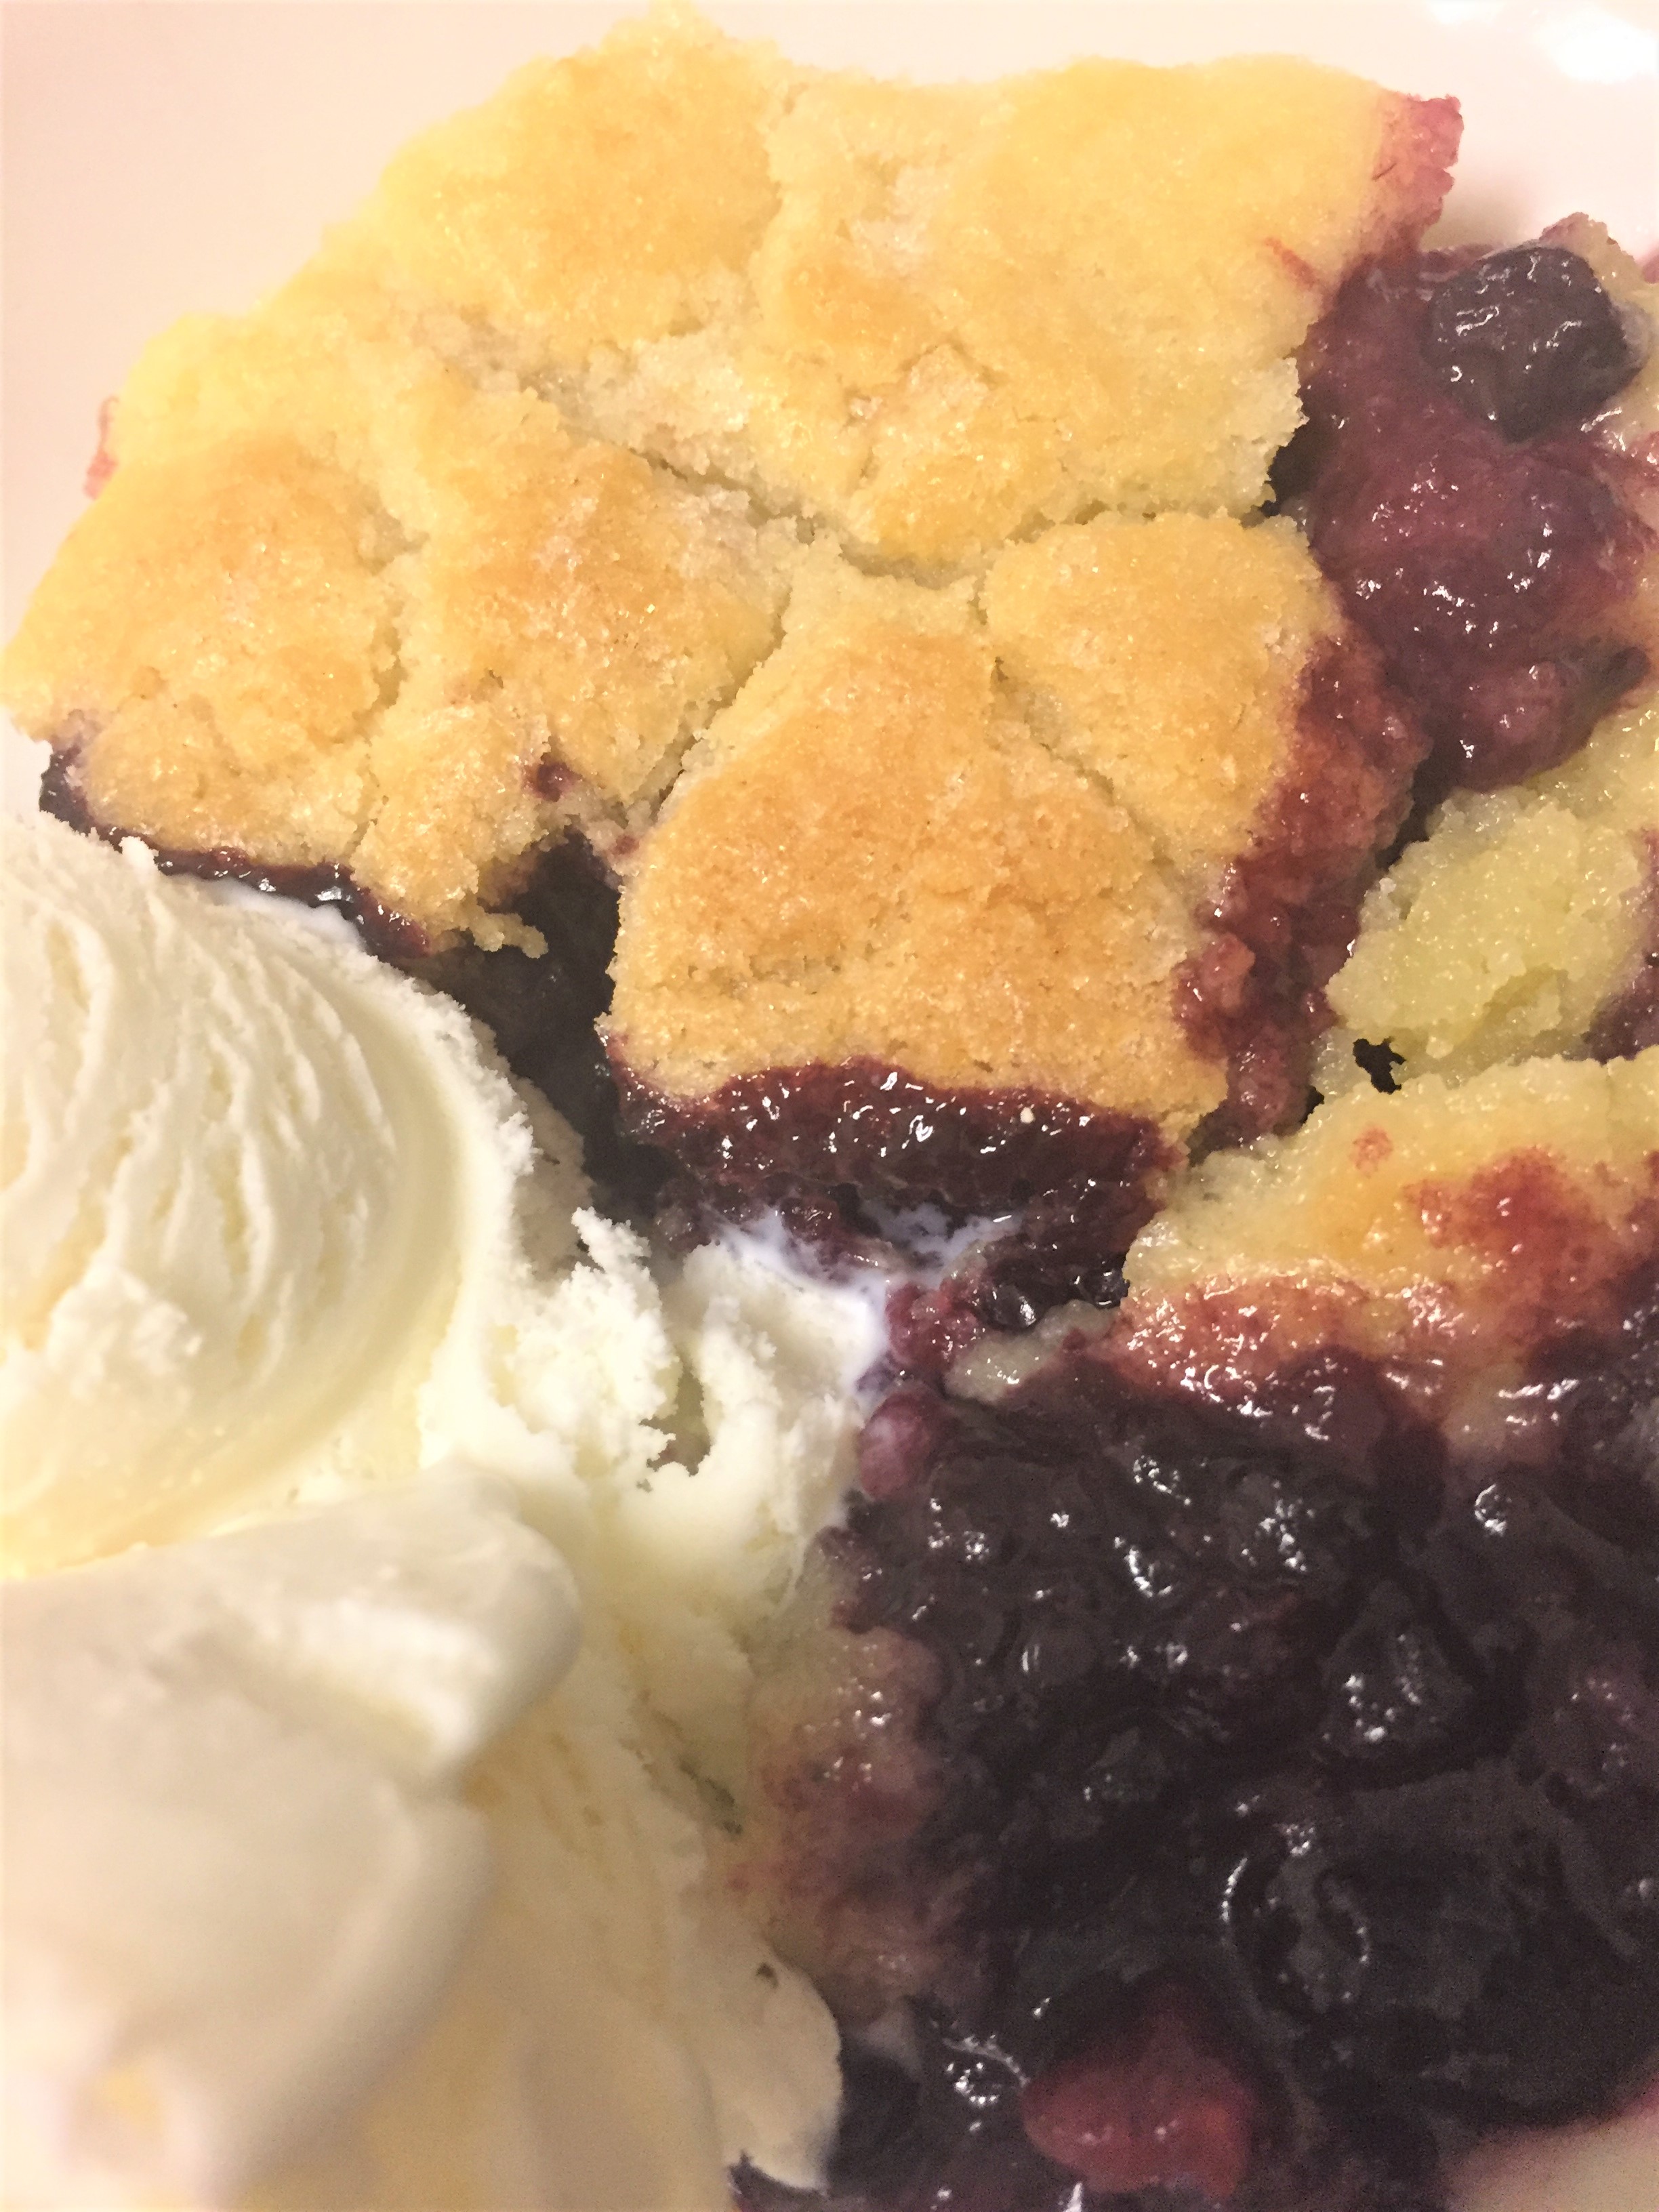
What could be better than a hot berry cobbler with a side of creamy vanilla ice cream? Isn’t your mouth watering? Cobblers are good any time of the year, but it’s such a great holiday dish, don’t ya think? You may want to consider this one for the upcoming holidays. This particular cobbler is a real favorite of mine. I love berries. Sometimes when I make this, I throw in some dried cherries or even cranberries. The cranberries give it such a holiday taste.

I have made this with fresh berries and also with frozen berries. I gotta say….I don’t really see a big difference. So if fresh berries aren’t available, by all means use frozen!

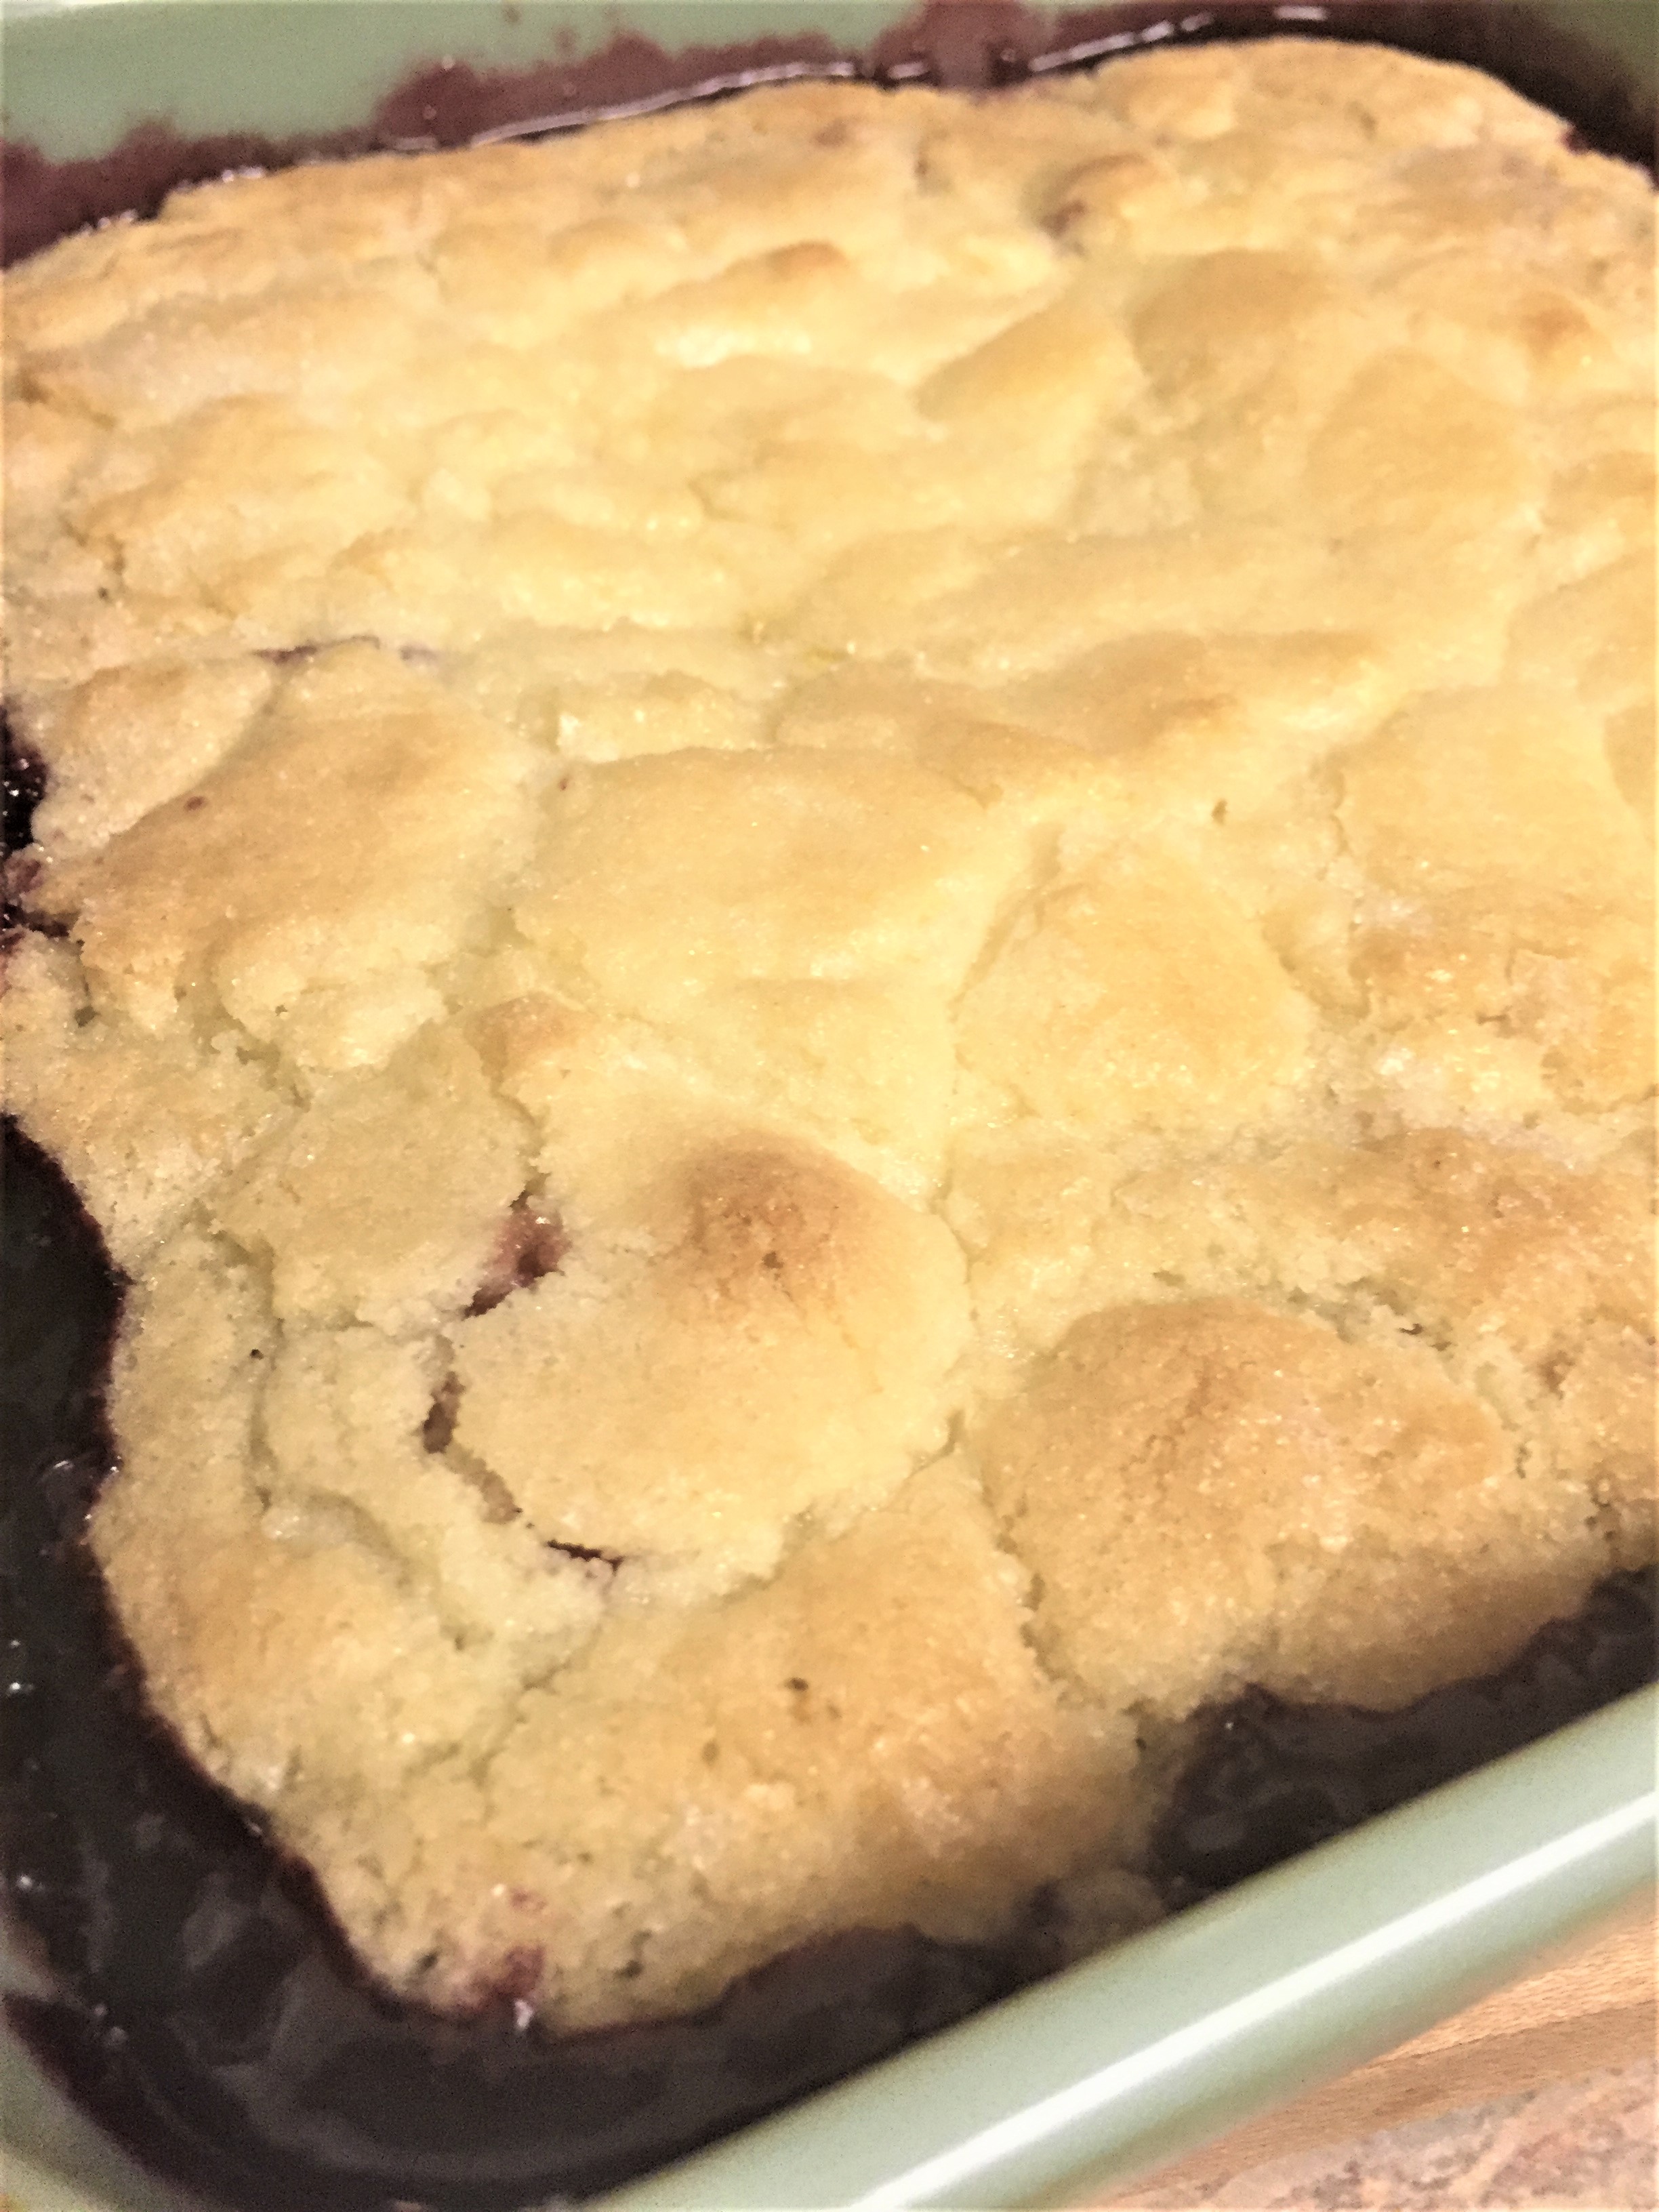
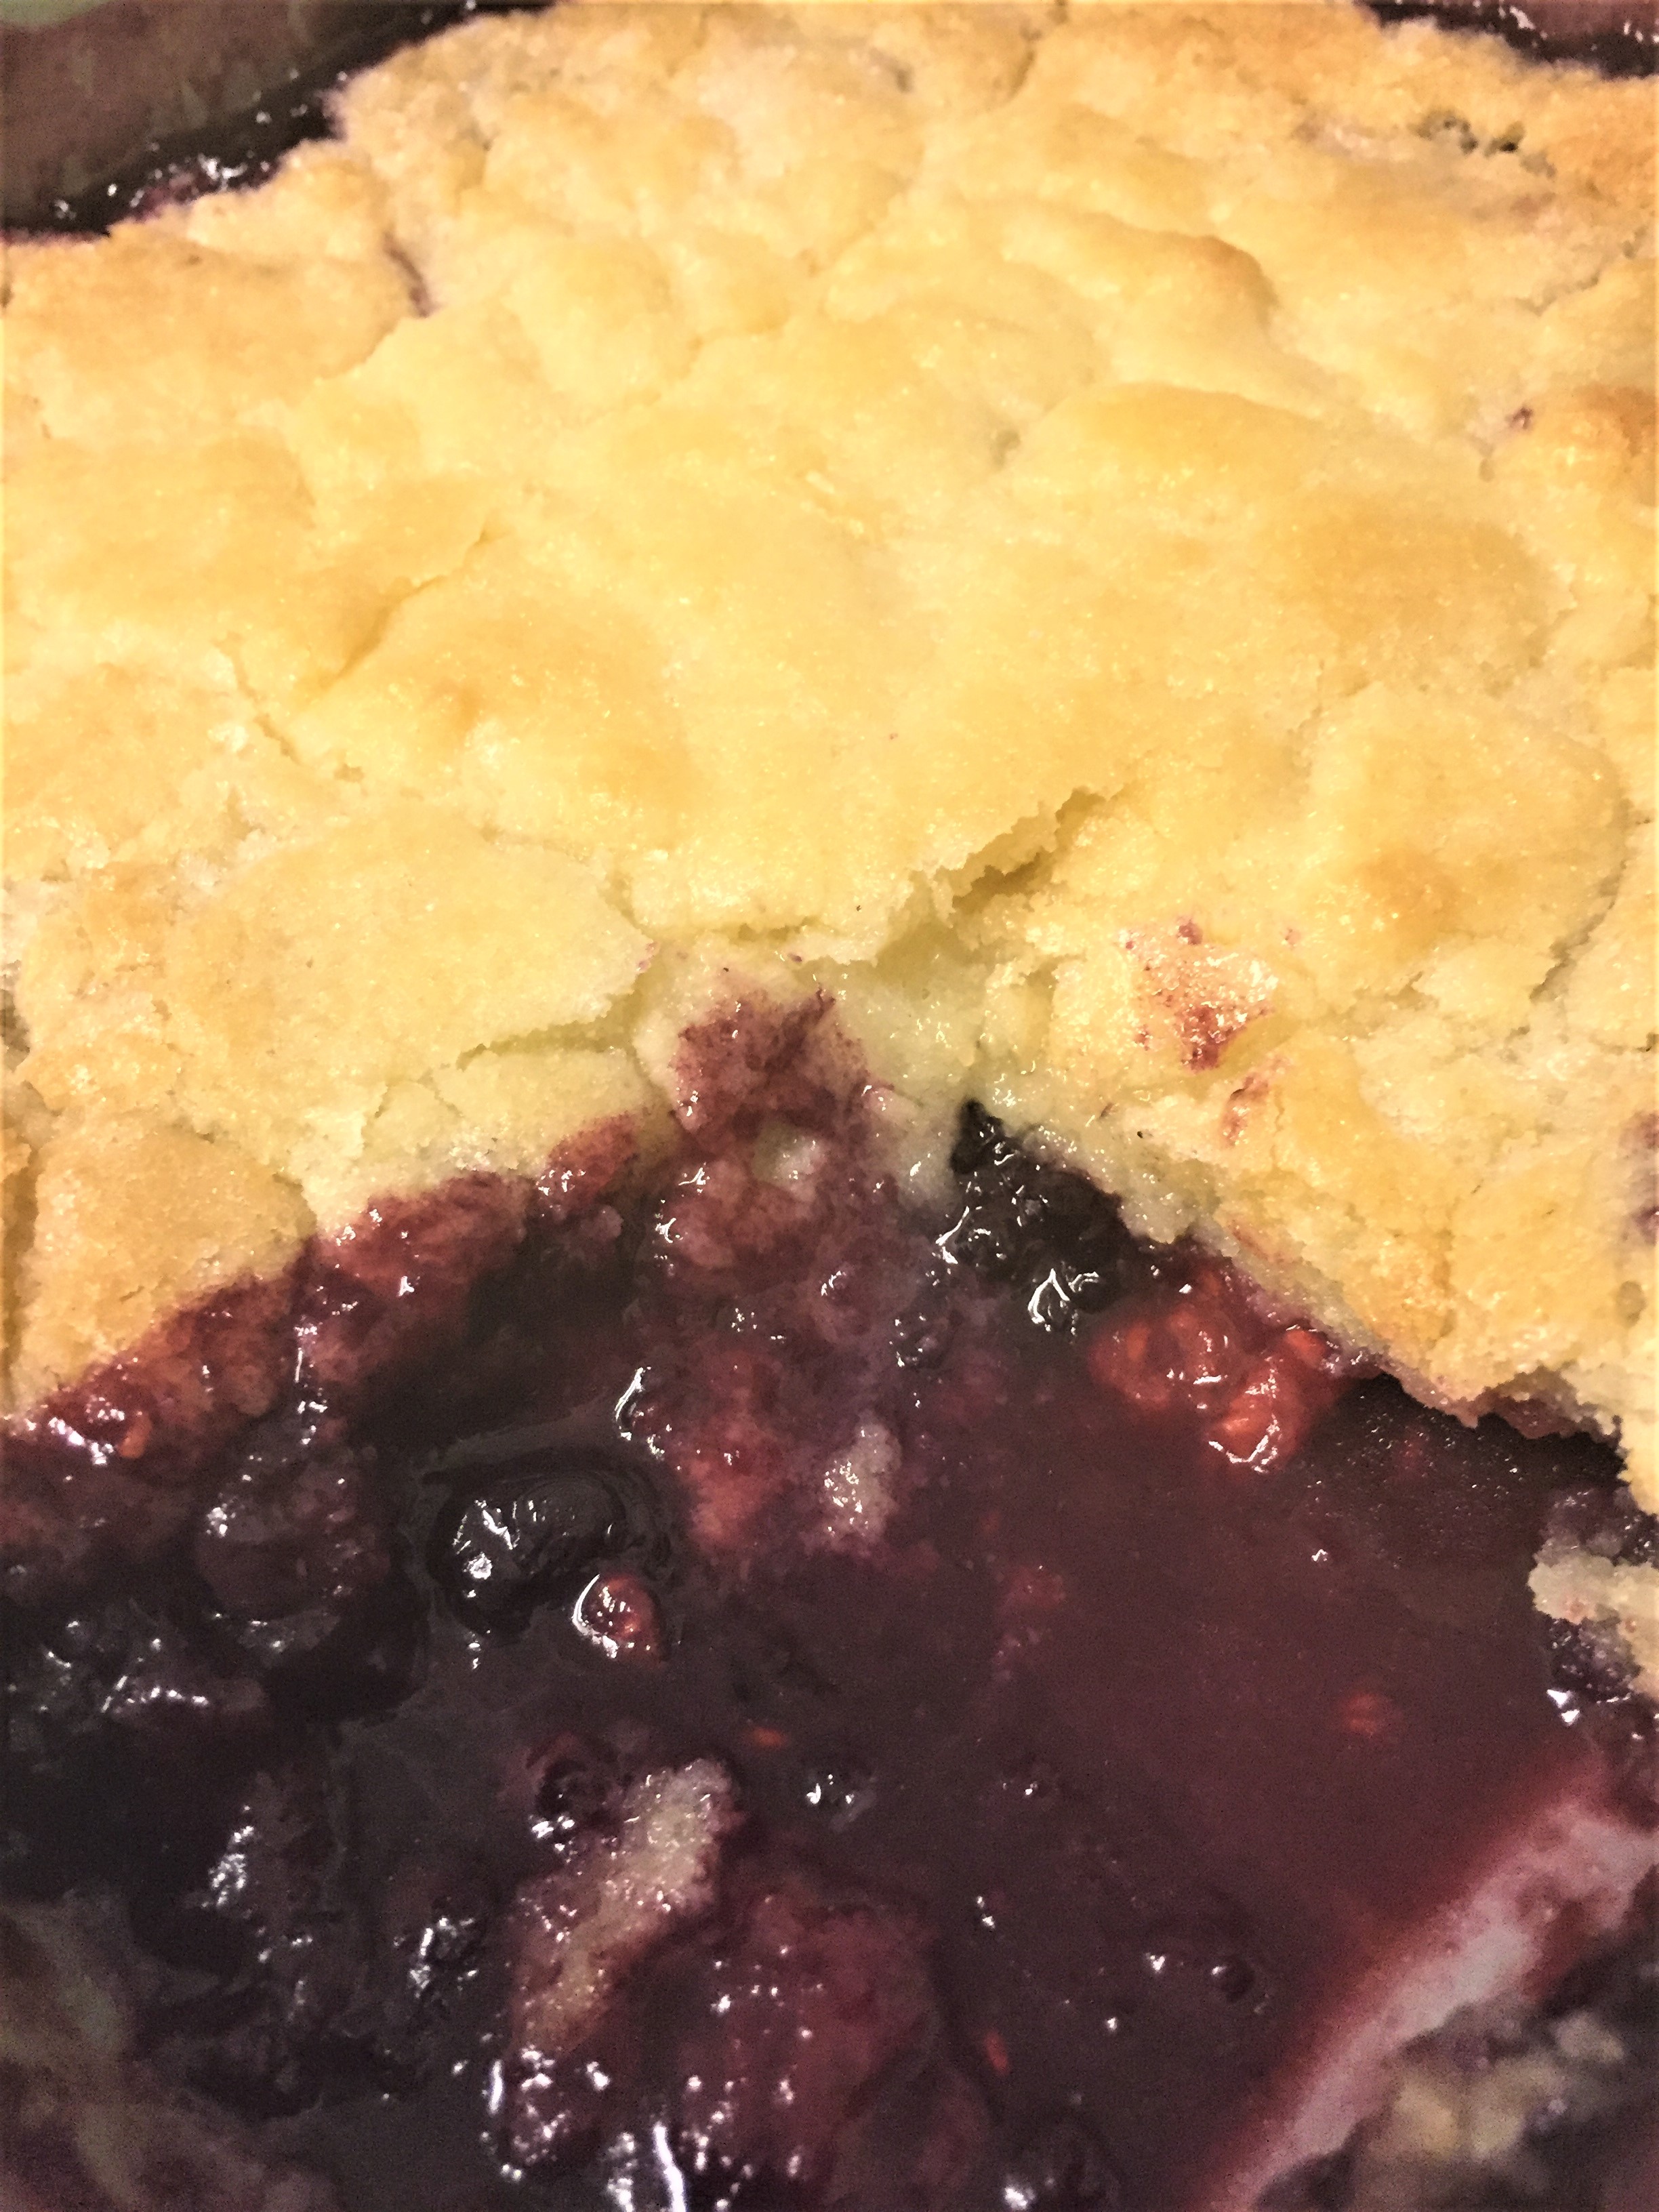
The crust/topping on this cobbler is the same as the one on my peach cobbler  that I posted awhile back. If you haven’t tried the peach, you will definitely want to. The crust on this cobbler is amazing. It really is. It’s not one of those puffy, fluffy crusts….blekh, I don’t care for those. This one is just something you’ll have to try. It has a bit of a crackly, sugary, melt in your mouth topping. I will tell you this…I will never make any other cobbler crust. This is my one and only.

Don’t forget to serve it with some good vanilla ice cream!


4 Berry Cobbler

Filling
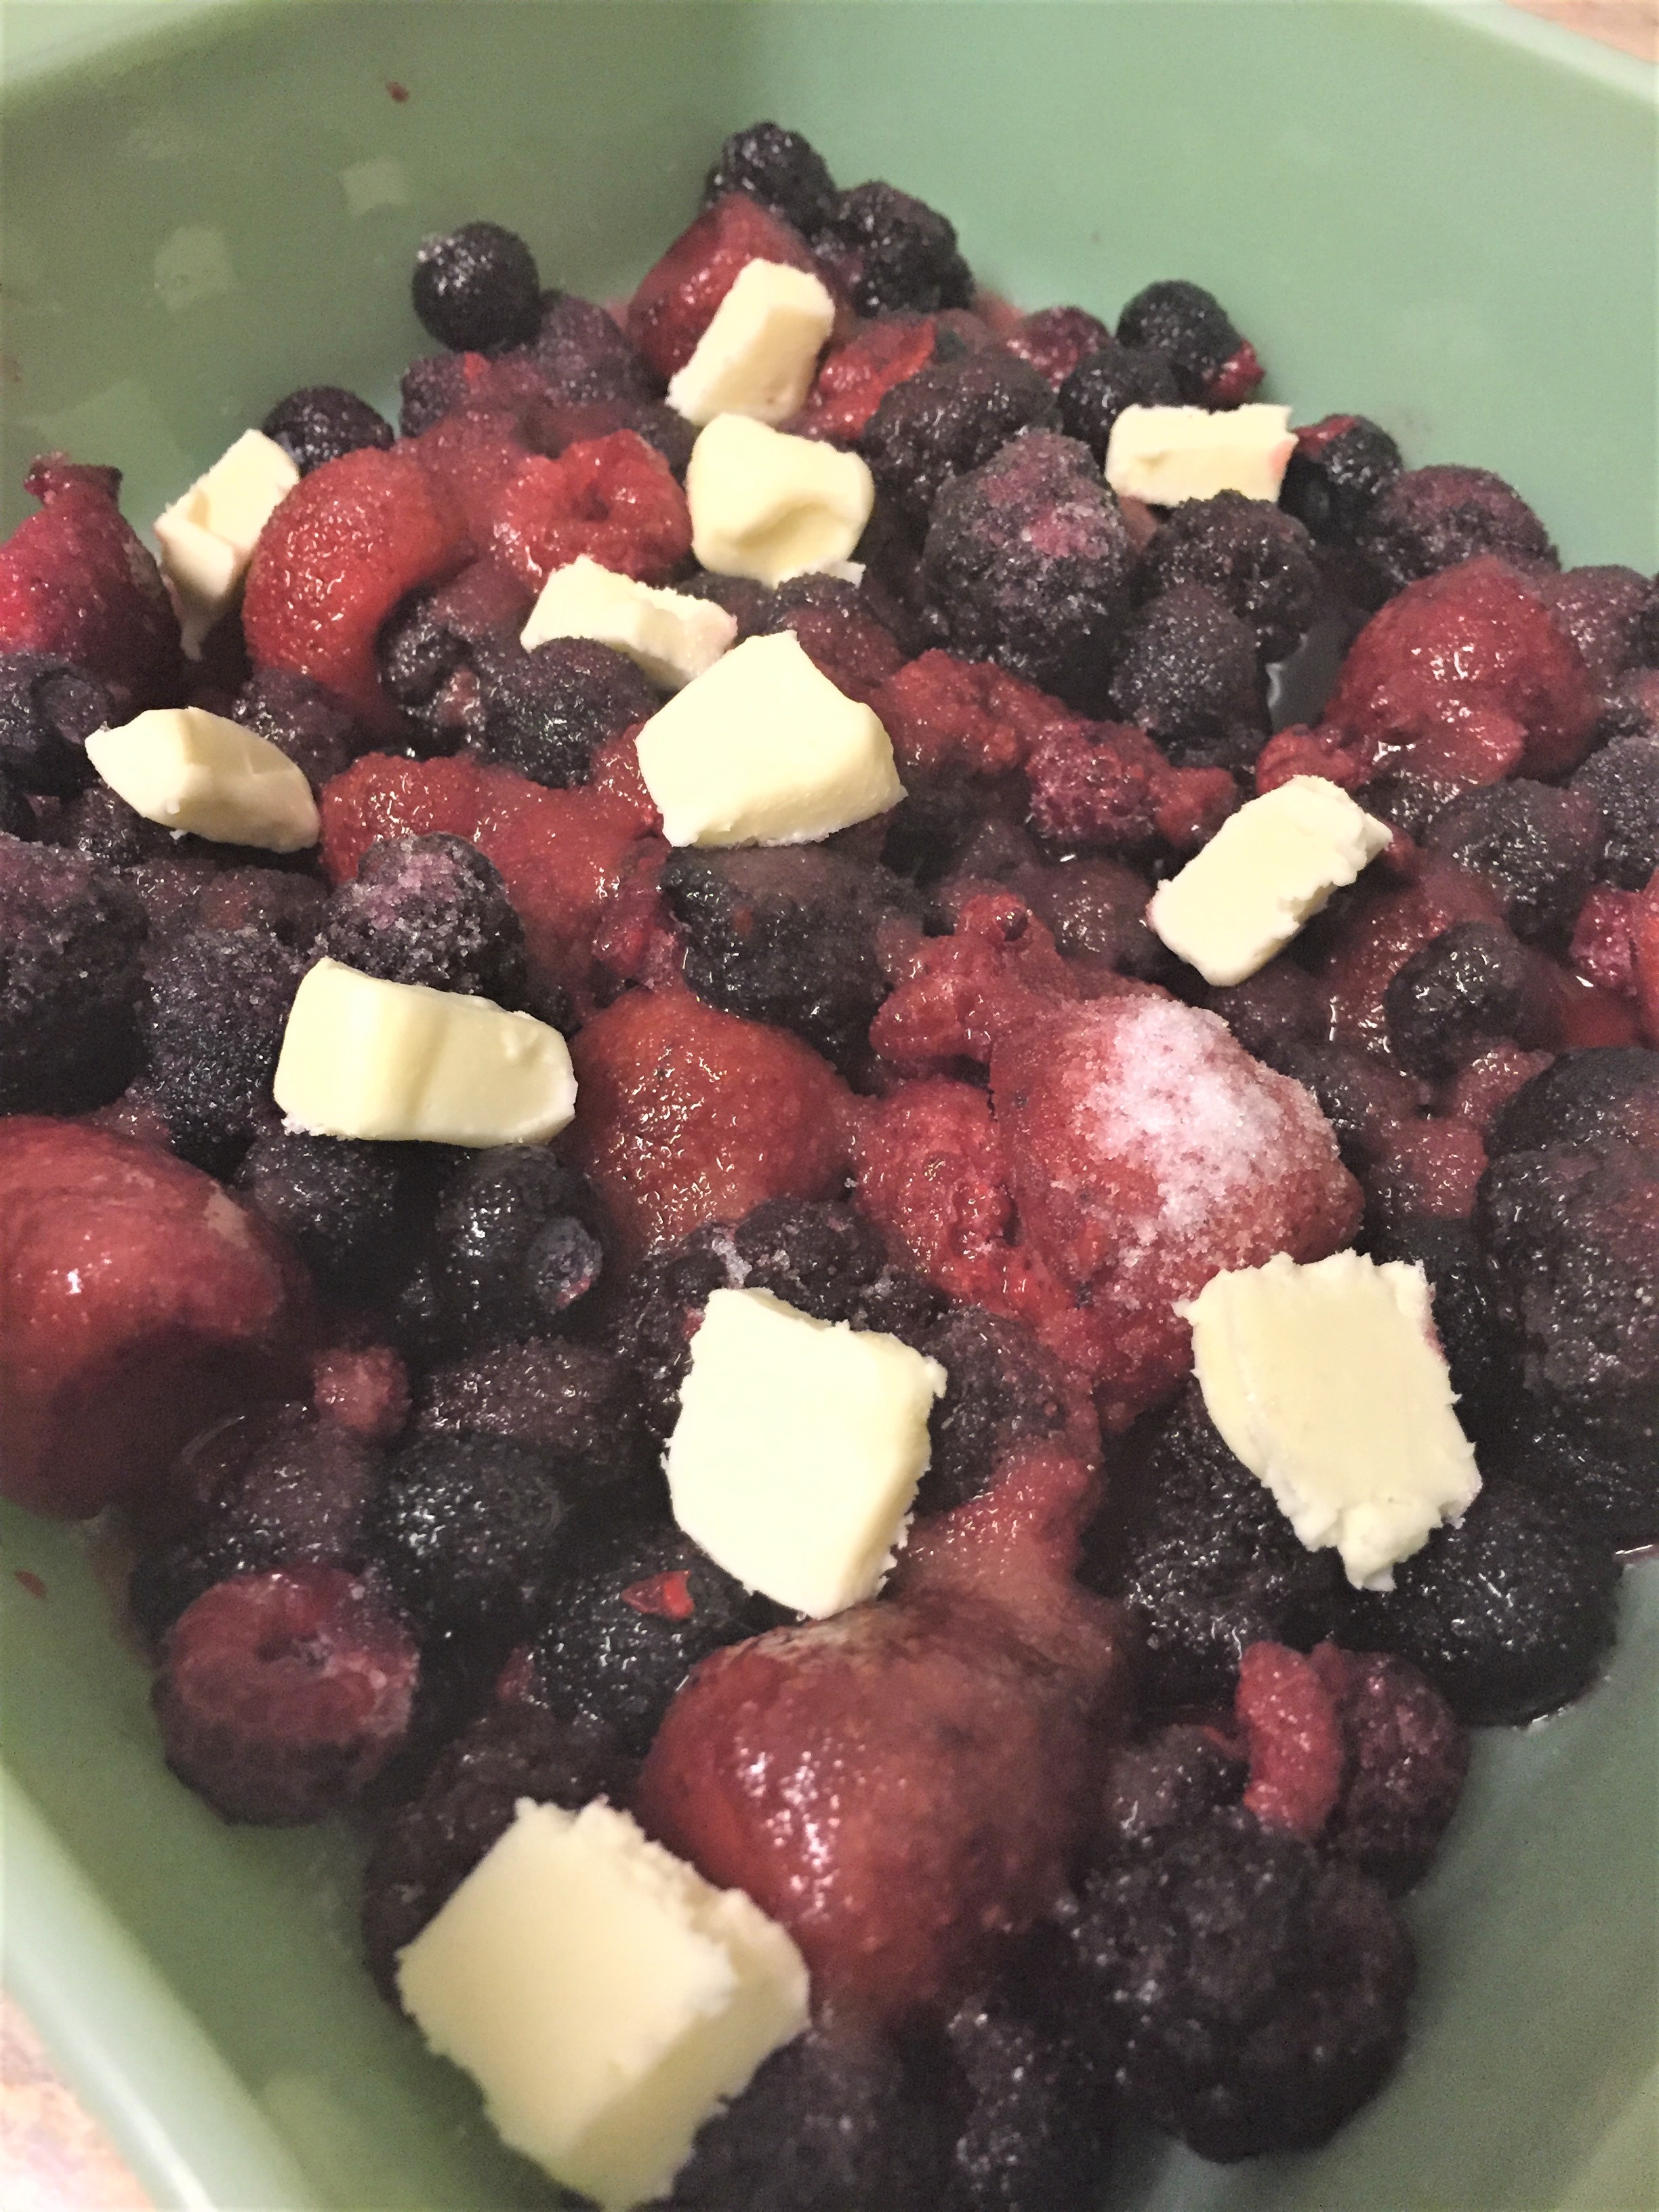
3 – 4 cups of berries (blueberries, blackberries, raspberries, strawberries) Frozen or fresh
1/3 cup sugar
2  tblsp butter
Put the berries in a square baking dish (9×9). Scatter bits of the 2 Tblsp. of butter on top of the fruit and sprinkle with the 1/3 cup of sugar. Set aside.

Topping/Crust
1/2 cup butter, softened
1  cup self rising flour
1  egg
1 cup sugar

Heat oven to 350.
Using a mixer, mix together the butter and sugar till creamy. Gently mix in the flour. Don’t over mix. Add the egg and mix just until smooth. Drop by little spoonfuls all over the fruit. Sprinkle with about 1 Tblsp. of sugar. Bake for 35-40 minutes or until top is golden. Allow to sit out for 15 minutes. Serve warm with vanilla ice cream.

Honey Oat Bread……………..

As I have said many times, I am a bread person. I’m crazy about breads. That isn’t necessarily a good thing. I wish I didn’t like bread so much. But, hey, it could be worse, right? But at least with this bread, I feel like I am eating at least a little bit healthy since it has oats!! oh, and honey too! Those two items make it a healthy bread, right? Ok, if you are afraid to make bread…afraid to work with yeast, don’t be. You can do this.  You will love this bread toasted with some butter and maybe some apricot jam or honey. It’s a soft and pillowy bread that’s so good just plain also. Seriously, you’ll want to eat the whole loaf. But don’t do that!  So, let’s get started.

honeyoatbread1 honeyoatbread2 honeyoatbread3 honeyoatbread4

Honey Oat Bread

3 cups all-purpose flour
1/4 cup oats
2  1/4 tsp rapid rise yeast
1  1/2 tsp salt
1 cup milk
1/4 cup water
2  tbsp butter
1/4 cup honey

In a bowl of a standing mixer, mix the flour, oats, yeast and salt together. In another little bowl, heat the milk just enough to melt the 2 tbsp butter. Stir the heated milk and butter and add the water and honey. Pour the mixture into the flour mixture, mixing with a dough hook, just until it comes together to form a dough. Knead the dough in the bowl, for about 10 minutes, until the dough is smooth. If it seems too sticky after about 5 minutes, add a couple of tablespoons of flour. NOT TOO MUCH. Dough should be smooth but not tacky. Put the dough in a lightly buttered bowl. Cover it with a towel or plastic wrap. Allow to rise until doubled, for about 1/2 hour to 1 hour.

When doubled, put the dough on a dry cutting board, lightly floured. Flatten the dough with your fingers, into a 9″ x 12″ rectangle. Tightly roll the dough into a loaf and put it in a loaf pan. Cover with a clean dish towel until doubled, about 1/2 hour to 1 hour. Preheat oven to 350. Carefully brush the top of the bread with 2 tblsp of warm honey. Sprinkle with some oats. Place loaf pan in the oven Bake for 40-45 minutes, until the top is golden brown. Cool before slicing.

Ohhhhhh, it’s gonna smell so good!!


Summer’s Over, but Ice Cream’s Not.

Summer is over and I made my last batch of ice cream for the summer. Hahahahahaha…yeah right. Most people relate ice cream to summer time. I actually love ice cream in the winter on a cold day. So just because summer has ended, I will still enjoy my ice cream. Especially home made ice cream. Especially Orange Chocolate Chip ice cream. Oh yeahhhhhhhhhhh. Chocolate and orange go very well together. If you follow my blog, you know how much I like my orange.

Awhile back I posted an orange chocolate chip cookie recipe. Amazing. I got to thinking how good the same combo would be in an ice cream! I’m smart like that. Ha!

I used my go-to base ice cream recipe……added some orange zest and some grated chocolate. A good quality chocolate is best. I used a Lindt Chocolate candy bar. Keep in mind, orange zest is strong, so if you only want a hint of orange flavor, use less orange zest.

Don’t wait till next summer to make this. I think you should make it soon!


Orange Chocolate Chip Ice Cream
makes 1 quart

5 egg yolks
1/2 cup half and half
1/2 cup whole milk
2 cups heavy cream
3/4 cup sugar
1 tsp vanilla
zest of 1 medium sized orange
1/2 cup of chopped or grated semi sweet chocolate

In a large bowl, mix together the egg yolks and sugar together. Set aside.

In a sauce pan, heat 1 cup of the heavy cream, the milk and the half and half, just until it starts to bubble. Remove from heat. Scoop out 1/2 cup of the hot liquid into the yolks and sugar, whisking quickly so your eggs don’t scramble. Pour that mixture back into the sauce pan and return to the heat. Stir constantly, for about 4 minutes or until slightly thickened. It wont be real thick.

Remove from heat and stir in the orange zest and vanilla. Allow to come to room temperature. Cover and allow to completely chill in the refrigerator for at least 5 hours. Over night is better.

Once completely chilled, stir the remaining cup of heavy cream into the mixture. Pour into your ice cream maker. Follow the instructions of your ice cream maker. I have a Krups and it takes about 20 minutes to churn. Transfer ice cream to an ice cream container and stir in the chocolate pieces. Freeze. But ya gotta taste it first, while it’s still soft! So good.

Jalapeno Popper Macaroni Salad

I have never been much of a macaroni salad fan. The only one I really like is one that I make with tuna in it. But otherwise, not so much. I recently came across a recipe that intrigued me because I love, love, jalapeno poppers! Mm–m-m-mm-m. Sure nuff, this mac salad tastes like a jalapeno popper. It has the jalapeno of course…..and the cream cheese….so good. I bet it would be good with some crumbled bacon! I may try that next time.

Now, the recipe does call for some sour cream. I was out of it, but I had some green onion dip on hand. So, I used that! Perfect.

This would be a great potluck dish. I hope you will make it. Enjoy.

Jalapeno Popper Macaroni Salad

2 cups uncooked elbow macaroni
1/4 cup sour cream
1/4 cup mayonnaise
1/2 cup cream cheese, softened
juice of half a lemon
2 good-sized fresh jalapeno, minced
1 fresh serrano pepper, minced
1 clove fresh garlic, grated
1 – 2 green onions, sliced
1/2 – 3/4 cup shredded cheddar cheese
salt and pepper to taste
chopped parsley for garnish

Cook macaroni until just done. Don’t over cook. Drain well.

Dump macaroni into a large mixing bowl.
In another bowl, mix together the cream cheese, sour cream, lemon juice, mayonnaise, garlic and green onion. Add this mixture to the drained macaroni, along with the jalapeno, serrano and shredded cheese. Mix together gently. Cover and place it in the refrigerator to chill.

Since pasta tends to soak up sauces and dressings, you may have to add a bit more mayonnaise before serving.

Optional: Sprinkle with bacon pieces.

Just the Best Wings Ever…….

Chicken wings are the best. Even though they are quite messy, they are so fun to eat. I recently posted a spicy blue cheese version and those are my favorite. But now that I’ve made these, I just don’t know….these may be my new favorite. Honestly, these are so good. The wings have a spicy Asian sauce that is just so, so, so delicious. It’s a good sauce to brush on regular roasted chicken thighs, breasts, or even a whole chicken. It’s a bit on the salty side (not good for my high blood pressure), but I just can’t resist these! The sauce is just something that I can’t describe. It’s like a spicy, sweet, sticky, salty teriyaki sauce. How’s that?

I have to ask you….have you seen those people who lick their fingers or suck their fingers when eating messy foods? Then they make that awful sucky smacky sound?  You’ll want to do that with these, but NO, please don’t! It’s kinda gross. Hahahaha, ewwwwww. Just a pet peeve of mine, but hey….if that’s your thing, have at it. 🙂 If you’re a finger licker, I’m sorry if I offend you, but please don’t send me angry comments. Hahahaha.

Anyway, back to the wings. The recipe calls for black bean sauce. You really must use this in this recipe. It’s what makes this the best sauce ever. I’m sure you have seen Chicken with black bean sauce or Black bean Chicken, on the menu at a Chinese restaurant. You can find the sauce in the Asian section of your local grocery store or at any Asian market, of course. It’s a fermented black bean sauce that is very salty and has a strong flavor. It’s wonderful, trust me. Don’t wrinkle your nose and think about leaving it out. Please trust me on this.  You’re going to love this sauce.


Best Asian Chicken Wings Ever

Wings (obviously) washed and patted dry

Sauce:

1/2 cup Frank’s Red Hot Wing Sauce
1/4 cup black bean sauce
1/2 cup soy sauce
1/4 cup brown sugar
1/4 cup Sriracha Asian hot sauce
1 tsp garlic powder
1/4 cup Sambal Chili paste (use ketchup if you want a less spicy sauce)
3 Tblsp melted butter

Mix all sauce ingredients together.  Set aside.

Heat oven to 425. Line a baking sheet with foil. Spray lightly with a non stick cooking spray. Lay out the chicken wings. Bake for 20-30 minutes, depending on the size of your wings. Remove sheet from oven and dump all of the wings into a bowl and pour the sauce over the wings and give it a toss or two, to coat the wings. Place each wing back on the baking sheet. Bake for another 5 minutes or so. I turn on the broiler for a minute or two to get the sauce bubbly and caramelized. This is optional.

Remove from oven and be careful. They will be very hot. I always serve a bit of sauce on the side.